
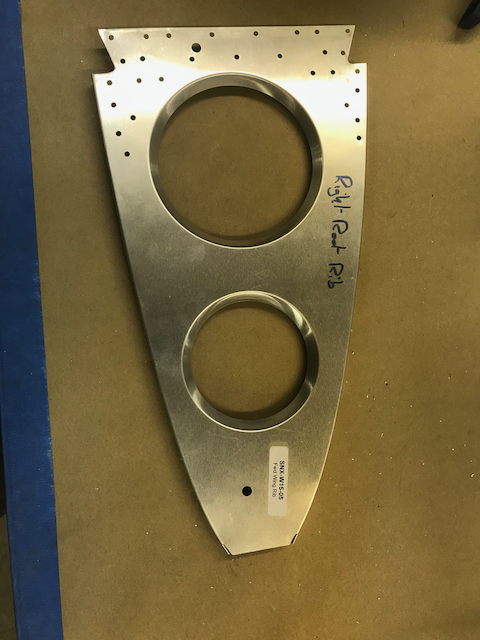
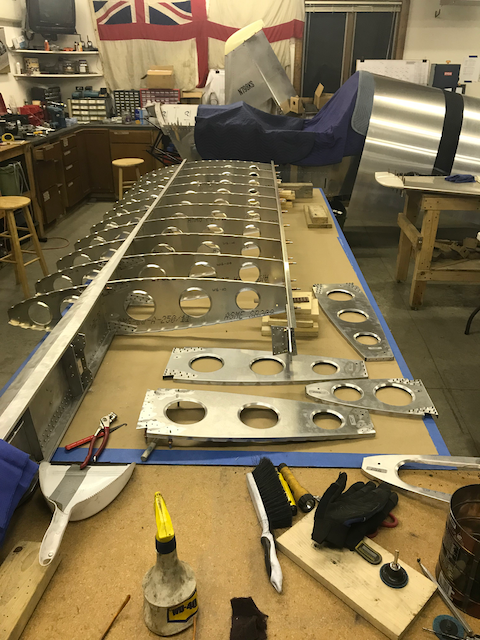
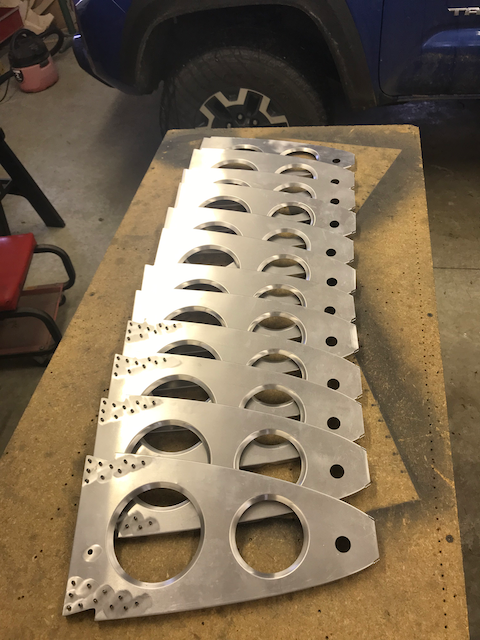
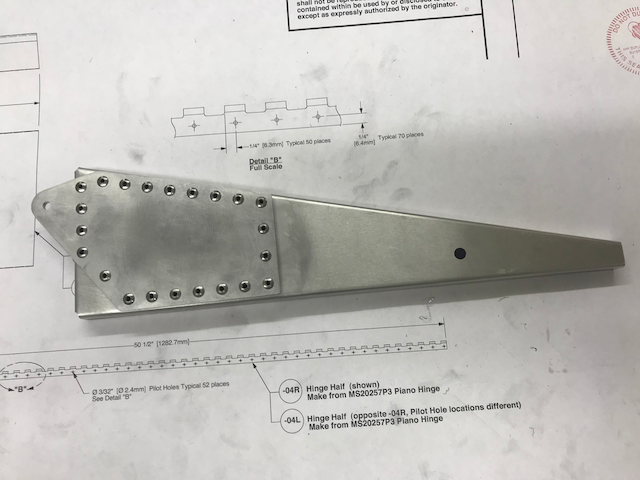
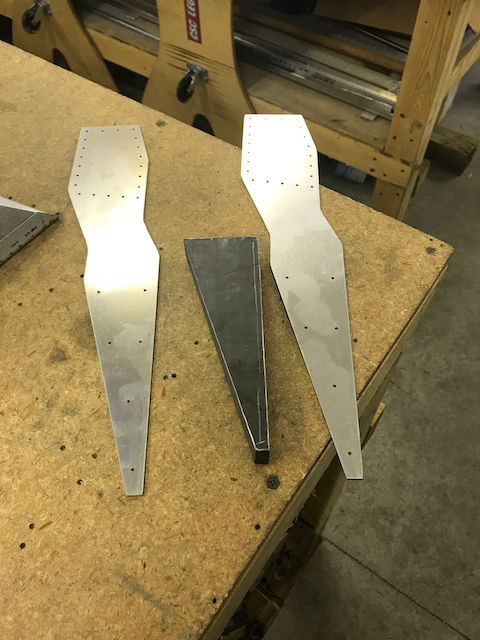
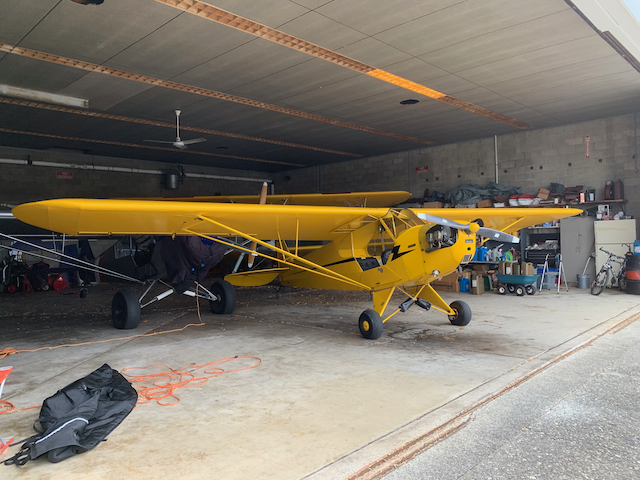
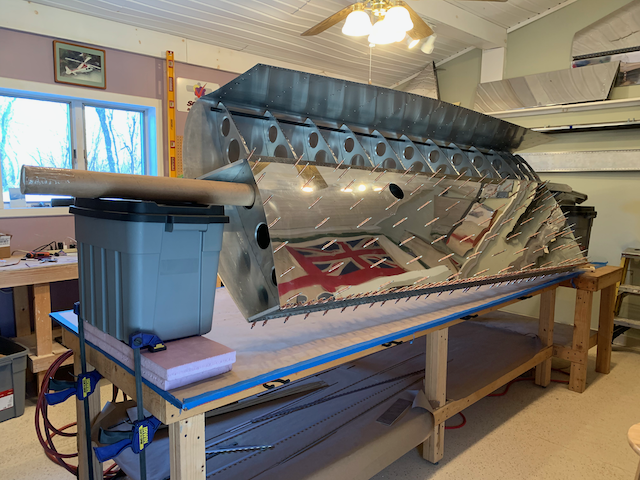
November 29th – To start the wing building, I laid out all the component parts that I have made so far.
-
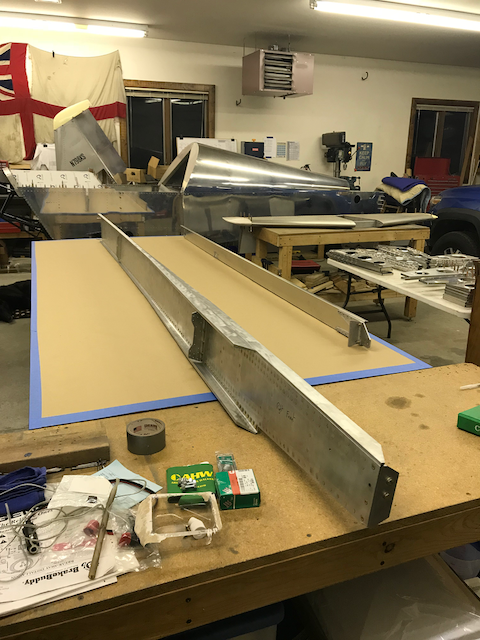
- Spars…
-
- …and ribs.
As you may recall, the main spar is made up of various layers of material and as such is a different thickness along its length. To account for this, spacers are made up so that the ribs don’t need to be individually sized along the length of the wing.
-
- Three thickness’…
-

- …two different spacers…
-

- …clecoed…
-

- …in place on the spars
-
- With…
-

- without.
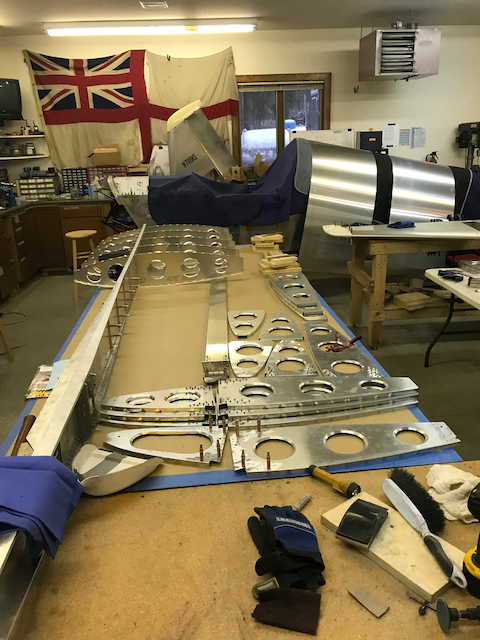
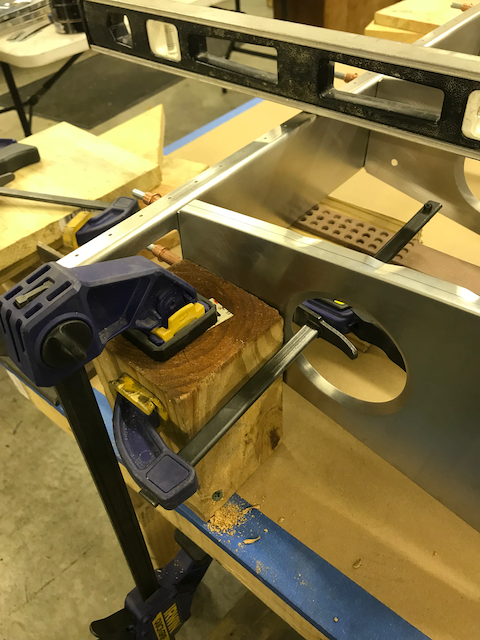
With the spacers in place, the ribs can be clecoed in place and the rear spar can be attached.

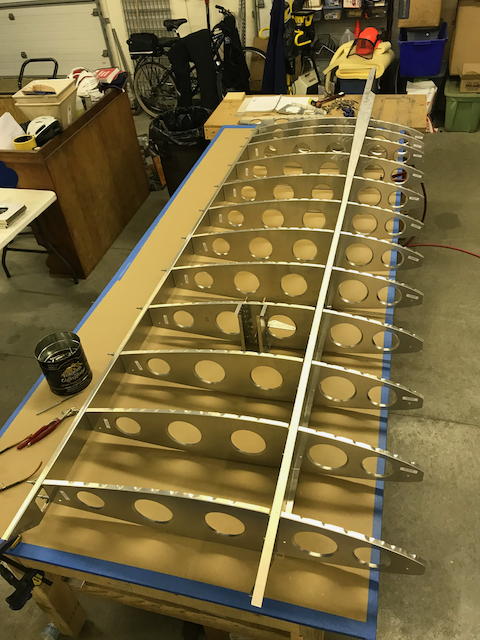
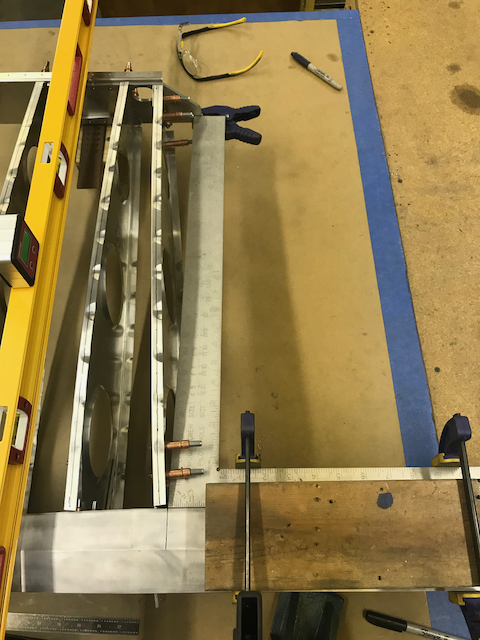
With the ribs in place, the root rib can be fitted but not before ensuring that the wing is straight and square; cue the spirit levels and framing squares.
-
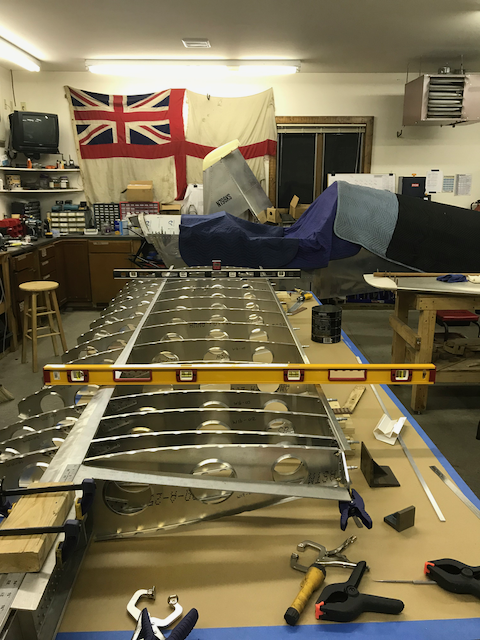
- Two levels and a square…
-
- …no…
-
- …twist.
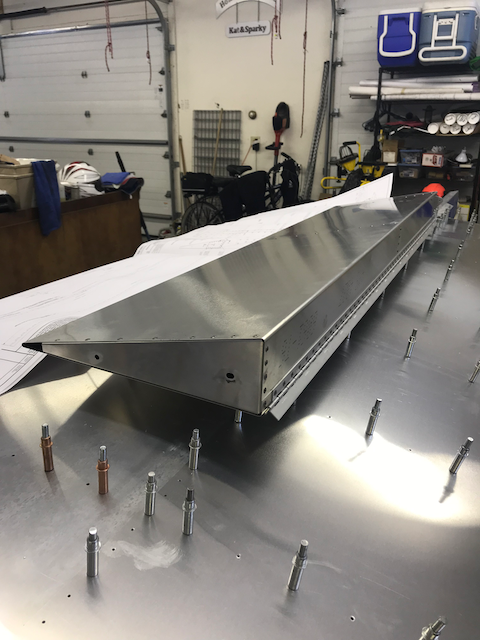
So far, so good. However, when I attached the Forward and Aft Root Ribs, it became apparent that things were not lining up very well and the attach angles seemed to be the culprits. To get a better idea of how bad it might be. I got the Aft Upper Wing Skin out and clecoed it in place.
-
- Skin attached…
-
- …Root Rib not flush…
-

- ..nor is the rear attach angle…
-
- …and Forward Root Rib misaligned.
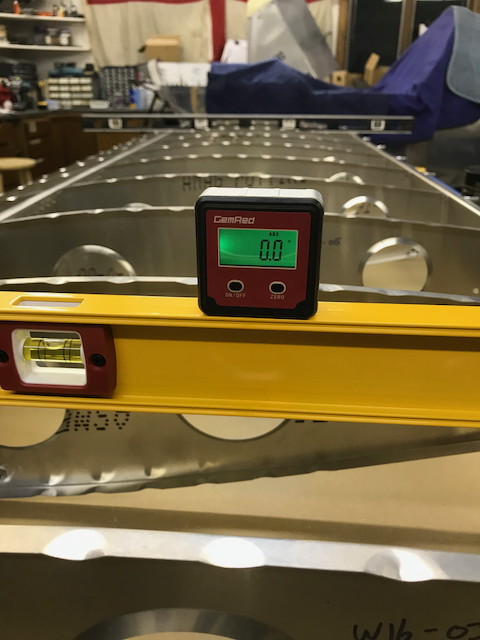
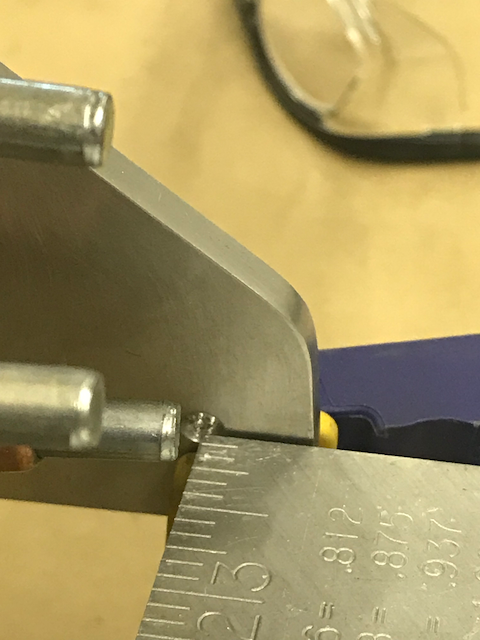
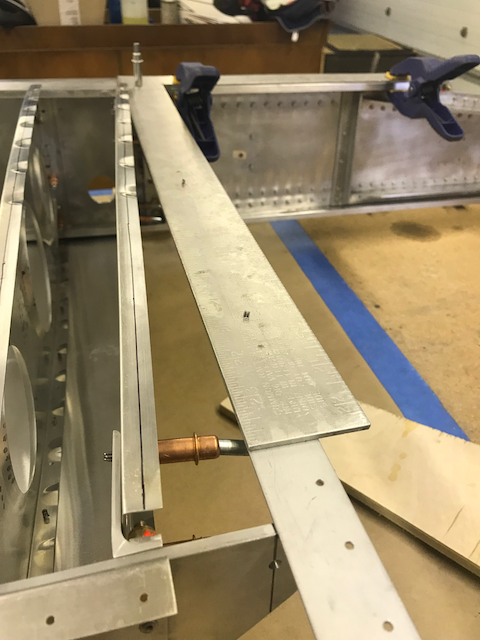
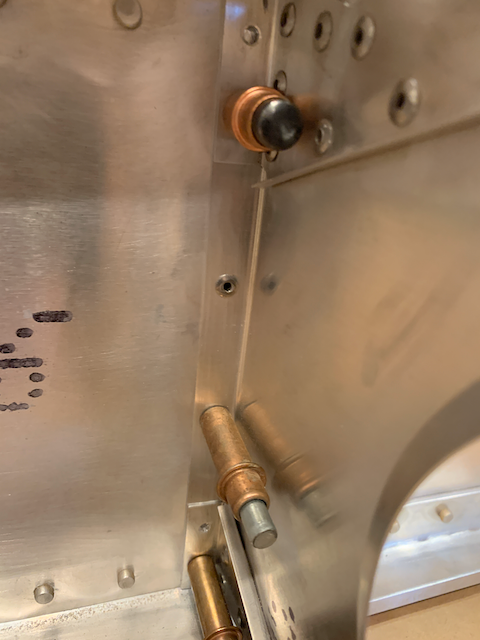
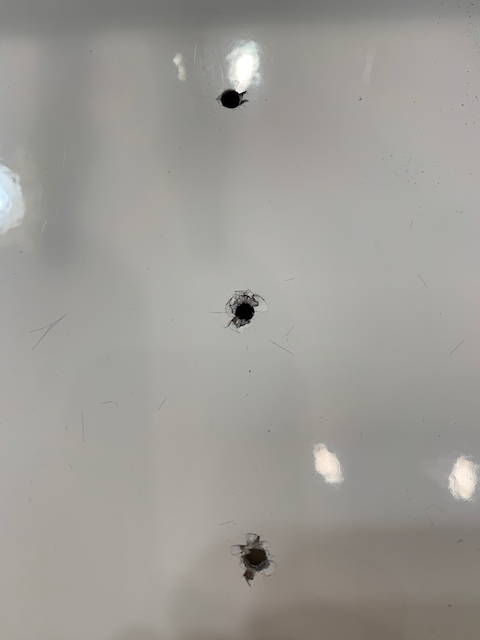
The misalignment of the Main Spar Attach Angles became more apparent when I put a straight edge over them.
I measured the angles and found that they were off by a few degrees, 83° as opposed to the 86.1° called out on the drawing.
-
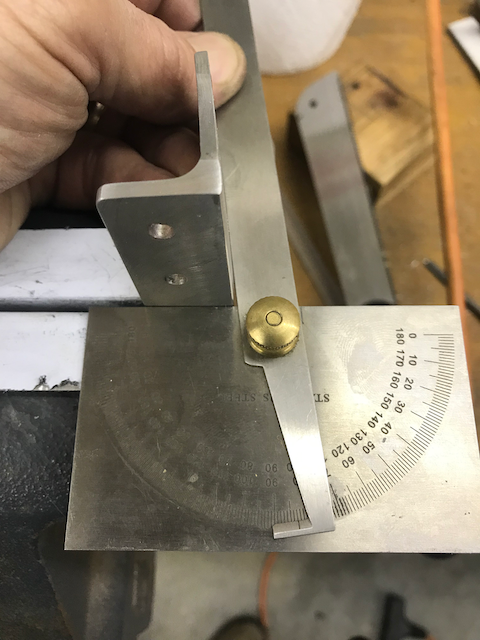
- 83°…
-
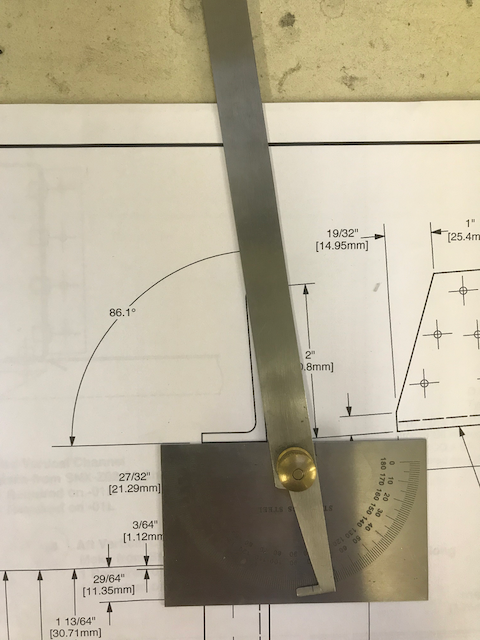
- …not 86.1°.
It’s not much, but it obviously makes a difference.
I wasn’t sure whether this was an acceptable amount of error, it was still possible to make things fit, so to be sure I sent an email to Kerry at Sonex Tech Support.
As always, the response was amazing; I heard back the next morning with attached instructions on how to bend the angles closer to spec.
I took them off, adjusted them, replaced them and hooked everything back up again.
Amazing the difference a few degrees makes.
Lesson learned; make sure to check the angles on all the supplied parts just to be sure.
With the Root Rib mounted to my satisfaction, the march of the clecos can continue in preparation of updrilling and a whole lot of deburring before riveting the wing skeleton together.

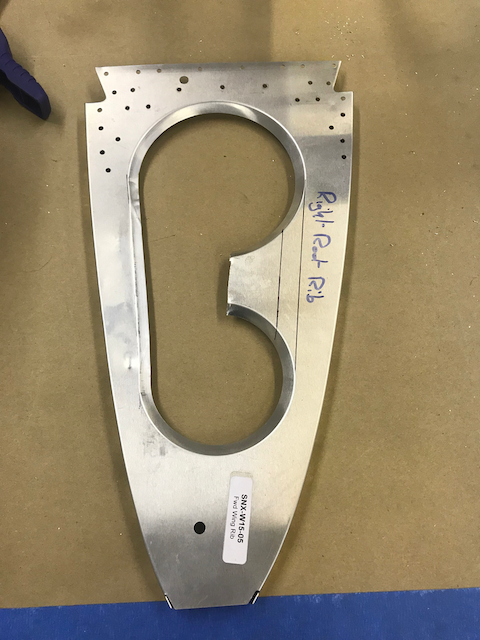
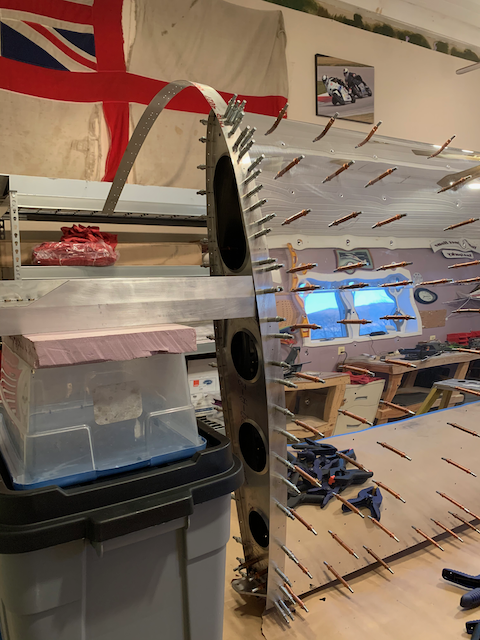
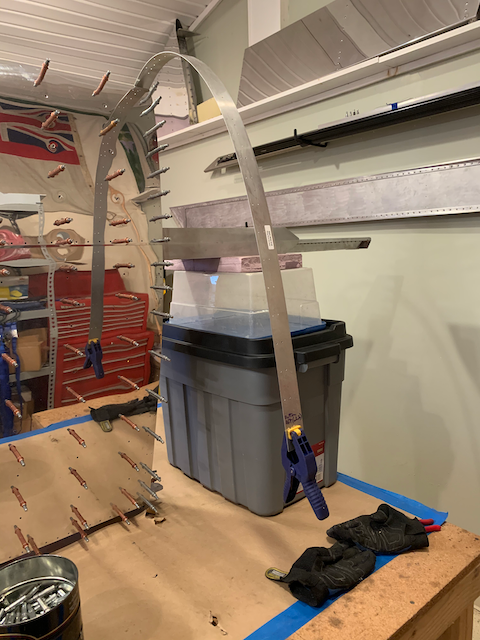
December 6th – After I had updrilled all the holes, I started on a modification recommended by many other folks who have built a Sonex; a modification of the Forward Root Rib to make the job of hooking up the Flap Linkage easier. This involves enlarging the lightening holes to make for easier access; I cut between the two holes with a nibbler and bent the remaining metal to make a flange all the way round the new hole.
-
- Original…
-
- …starting the modification.
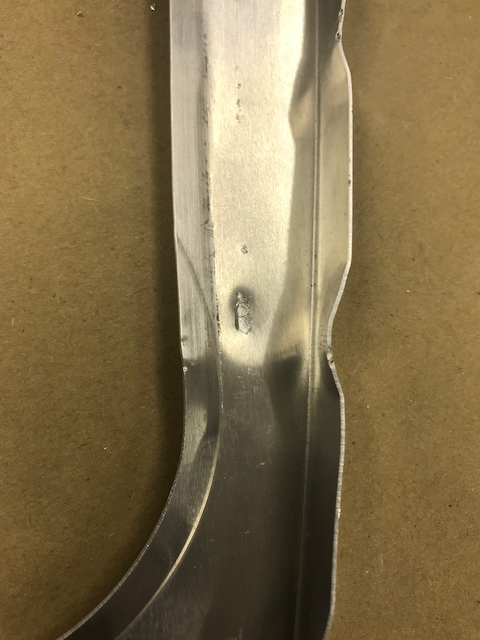
Unfortunately, when I bent the new flange, I managed to put an ugly series of dents in the flat part of the Rib.
The damaged rib would probably be sound but I decided to replace it. The Root Rib from the Left Wing is an identical part, so I robbed that and will order a new rib from Sonex to replace it with when the time comes.
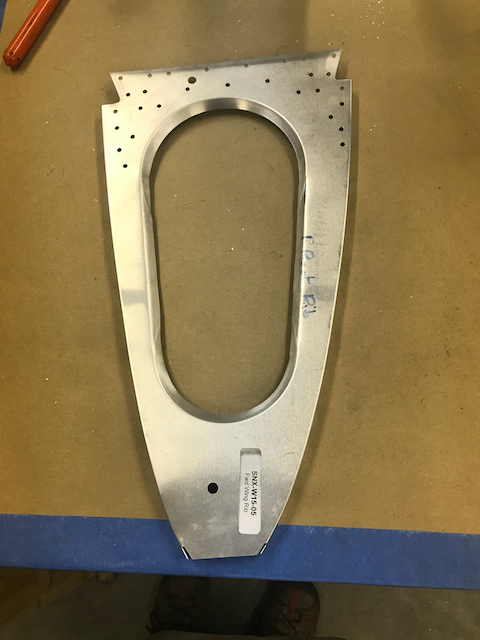
Taking what I had learned from goofing up the first attempt, I now have the result I was looking for and can move ahead with deburring and cleaning up the ribs and spars ready for riveting.
-
- A slow process…
-
- …continues…
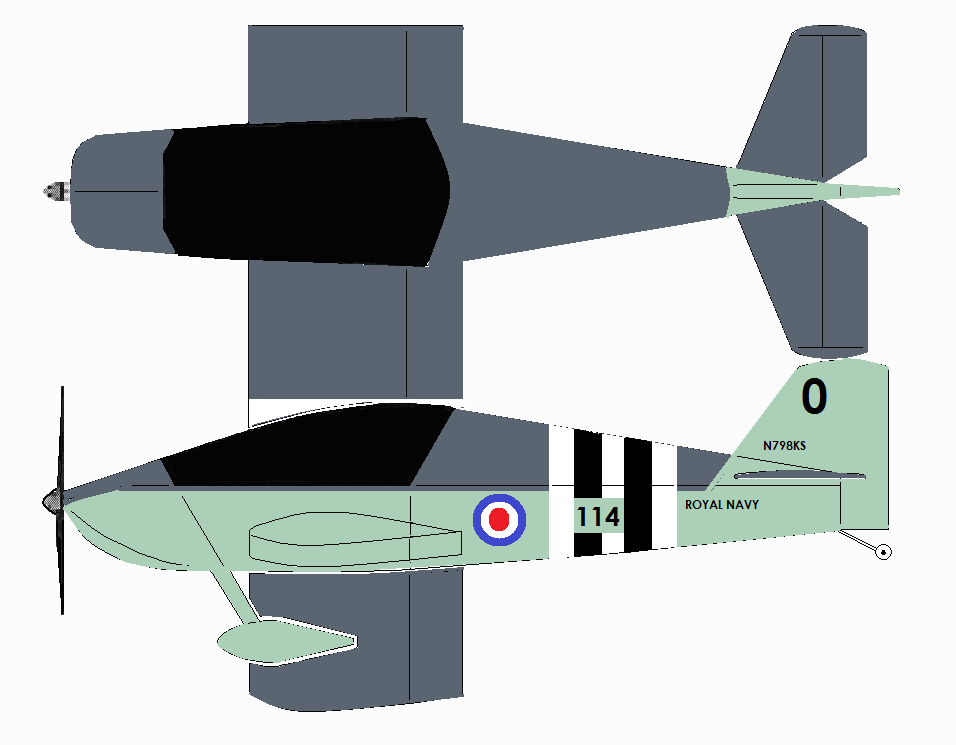
As an aside from continuing work on the construction phase, I am having second thoughts about the finish.
I have polished some of the airframe as I was going along but I am starting to lean towards paint. I know I will give up some payload/performance but I have come up with a paint scheme that might be fun.
When I was stationed at RNAS Yeovilton many years ago, the Fleet Air Arm Historic Flight was also based on the airfield. I have fond memories of watching the display pilots practice their routine in the Hawker Sea Fury; the sound of the Bristol Centaurus engine as they made their low passes along the runway will stick in my mind for ever.
I will only have a flat four engine compared with the double-banked 18 cylinder radial of the original but here’s an early sketch of a representation of the Korean War era paint scheme as applied to the mighty Sonex!
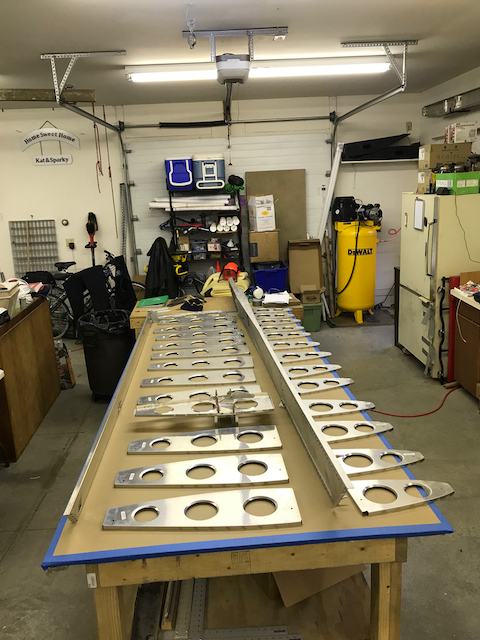
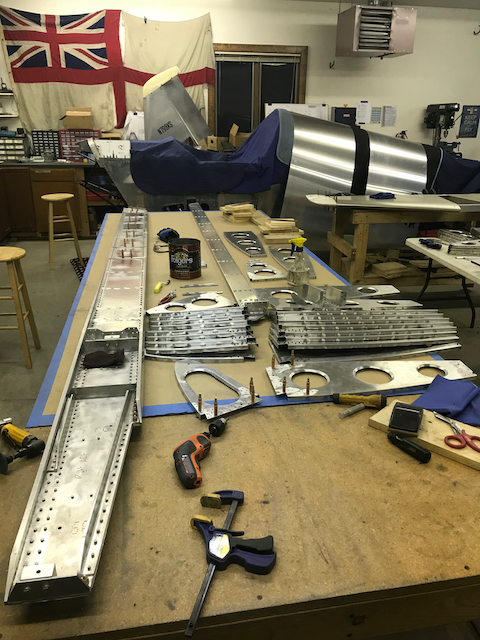
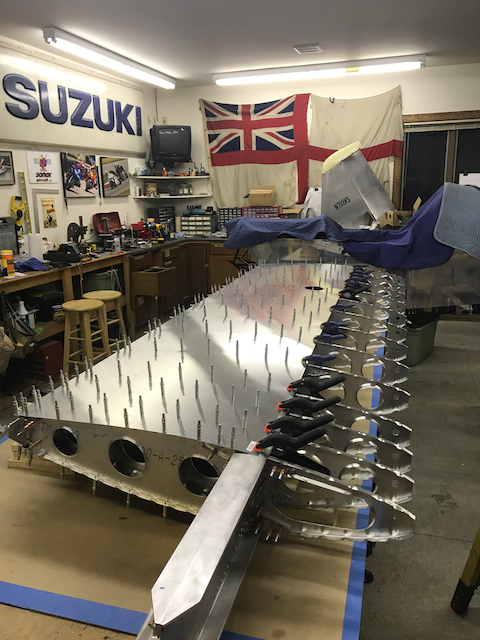
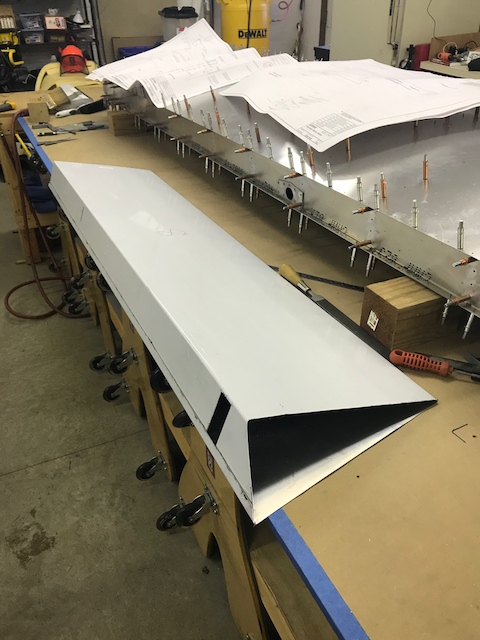
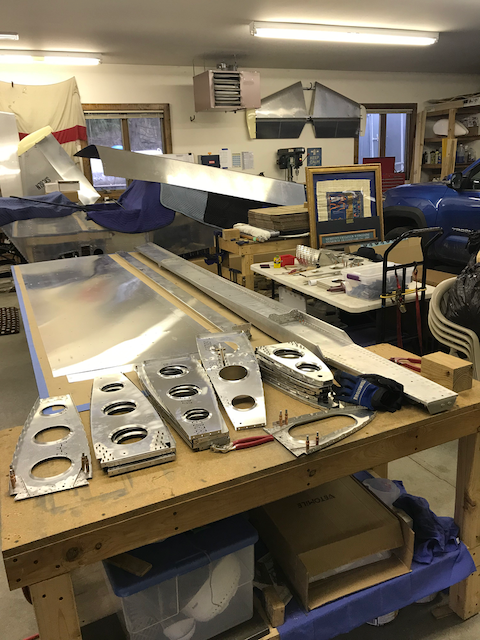
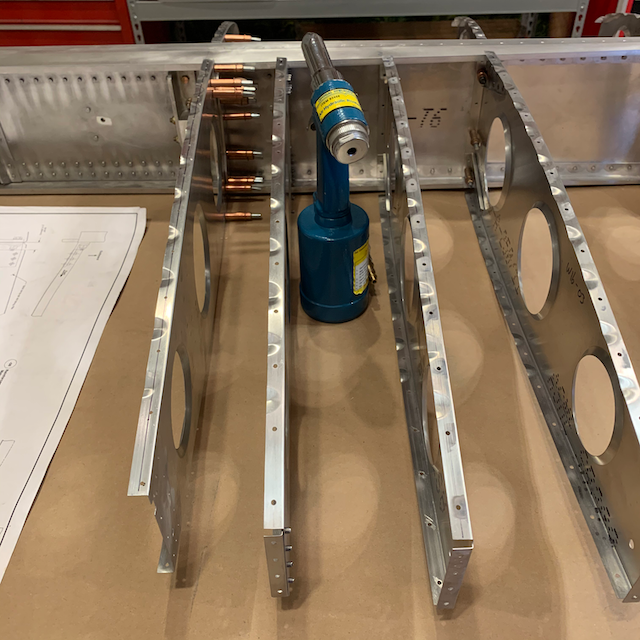
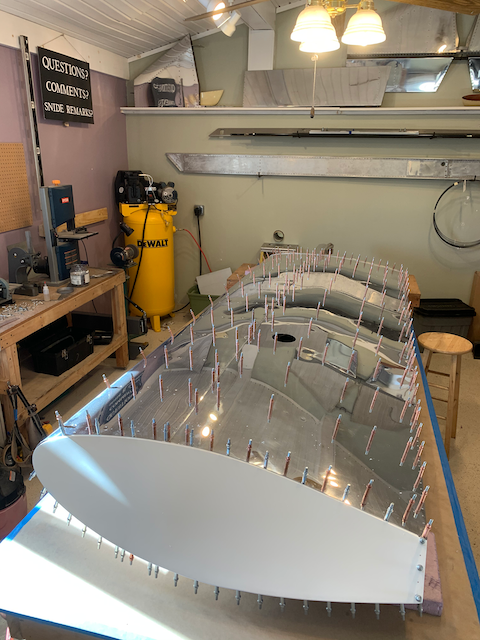
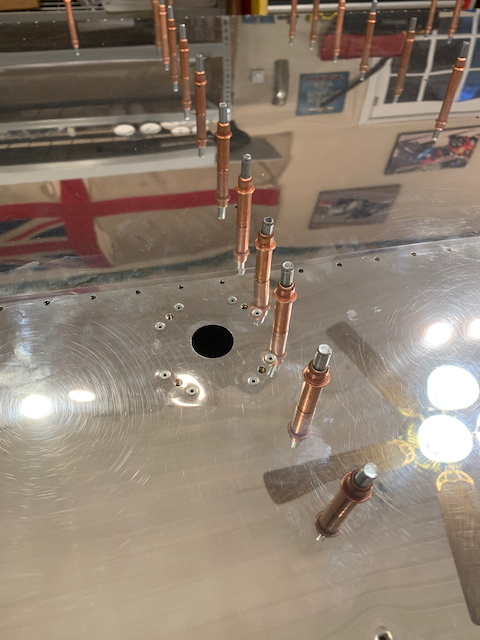
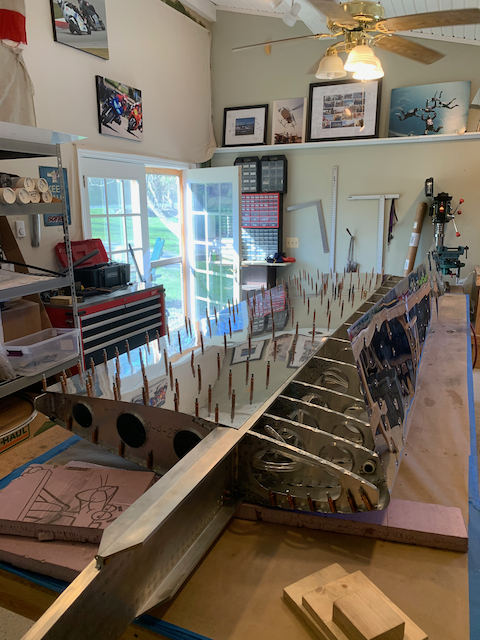
December 24th – The lengthy process of deburring everything is done and all the components to start building the wing skeleton are laid out on the bench.
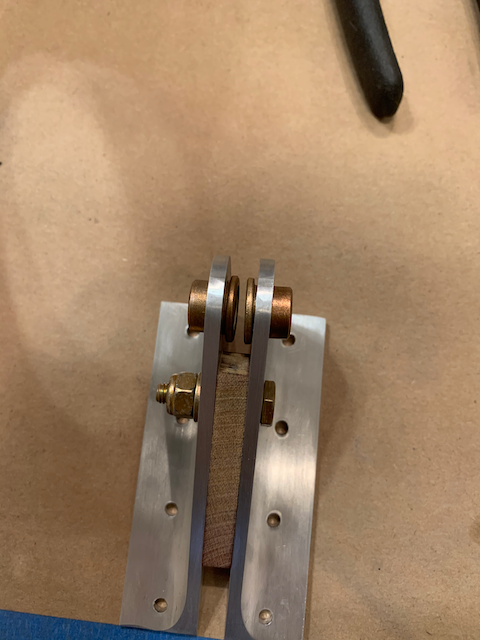
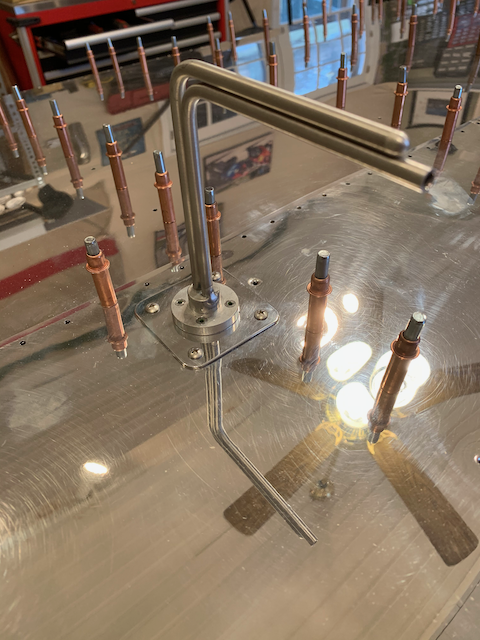
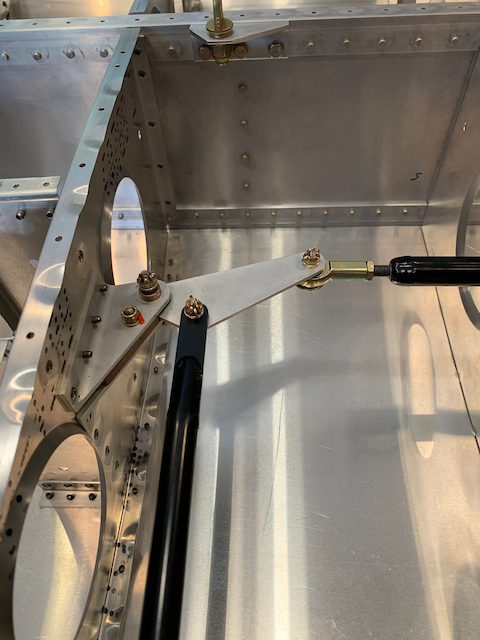
I started by riveting the aileron bellcrank in place.
-
- All parts laid out…
-
- …bellcrank riveted.
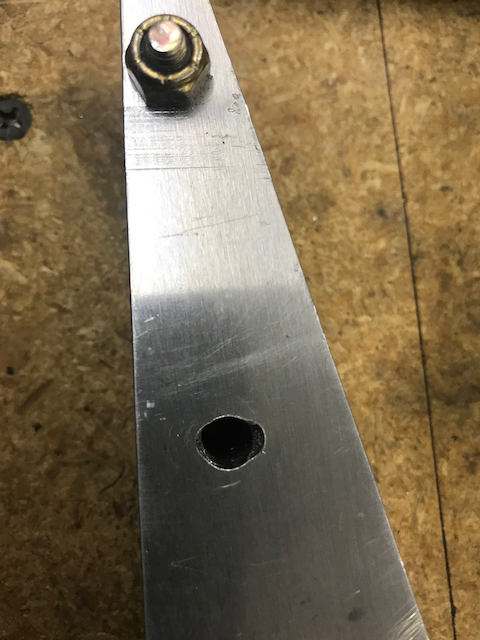
When I was deburring the spars, I found a couple of ugly holes where I had updrilled the ribs; I think I must have had the drill misaligned. I have updrilled then to 5/32″ holes and will use oversized rivets to get a good joint.
-

- Ugly hole…
-

- …better.
I had a brief moment of panic when I went to confirm the torque numbers for the bolts in the spar; I thought I had under torqued them, which, if it was the case, would mean that I have under torqued all of the bolts in the entire build! With more research, I realized I was looking at the wrong column on the torque tables, and everything is good. Phew!
With that cleared up, I applied torque stripe to the nuts. This is a paste that runs across the nut onto a fixed surface that will crack if disturbed. It makes subsequent inspections of all bolted joints feasible.
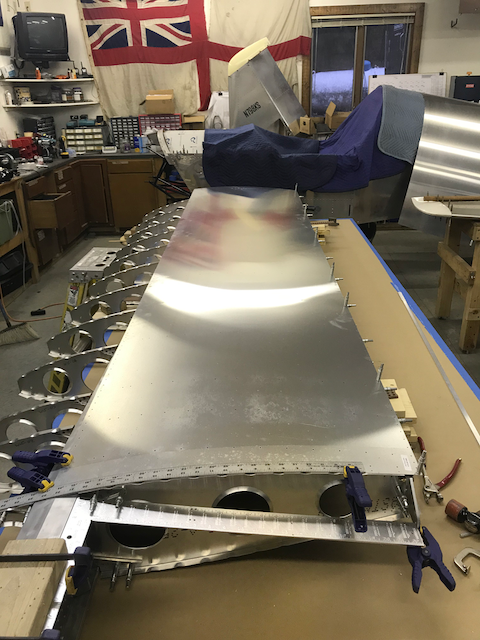
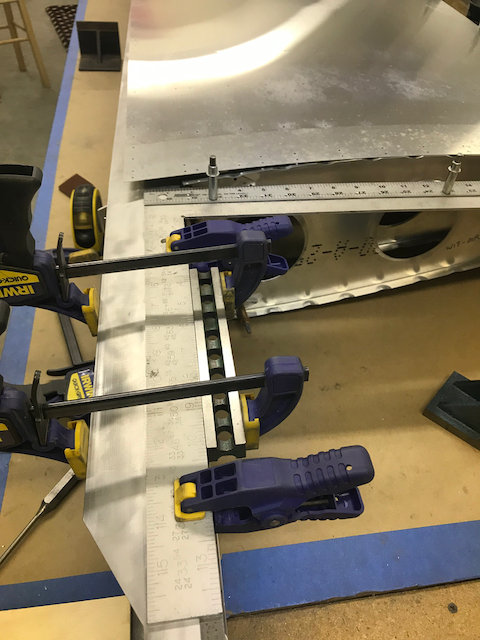
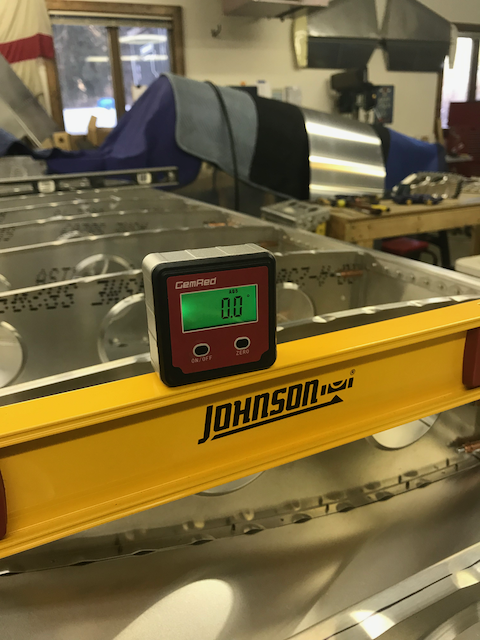
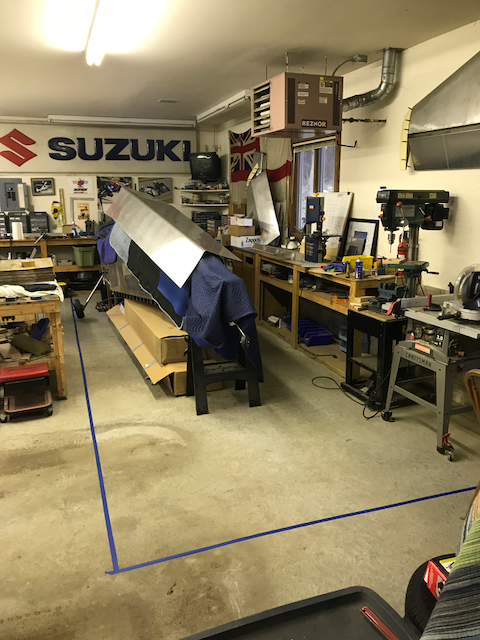
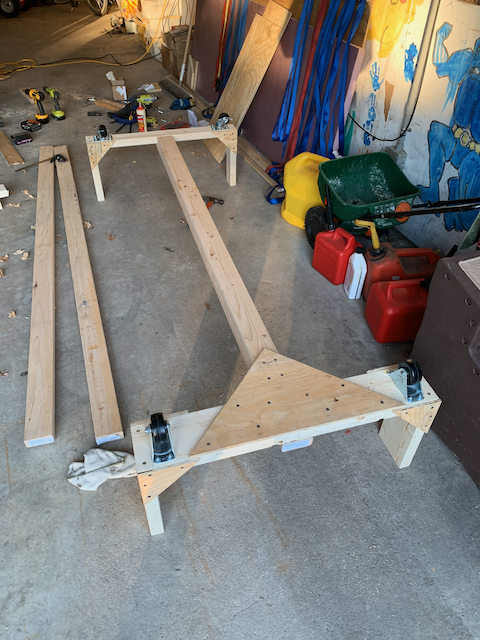
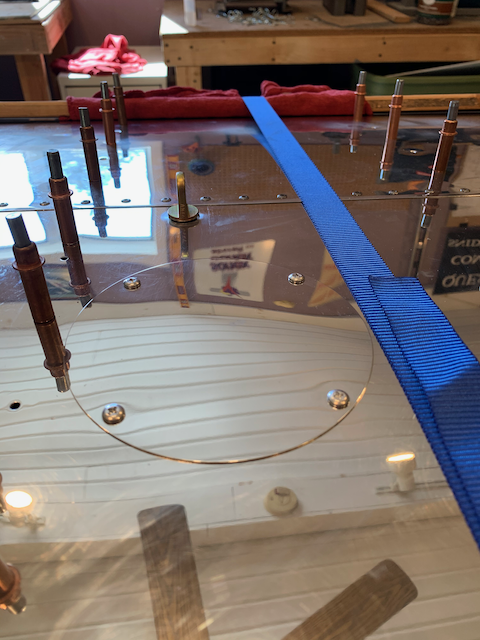
Then it is a matter of building the wing structure up again, ensuring everything is straight, square and without twists, then starting the skinning process. To aid with this, I am building a jig with various pieces of timber to hold everything in place.
-
- Square…
-
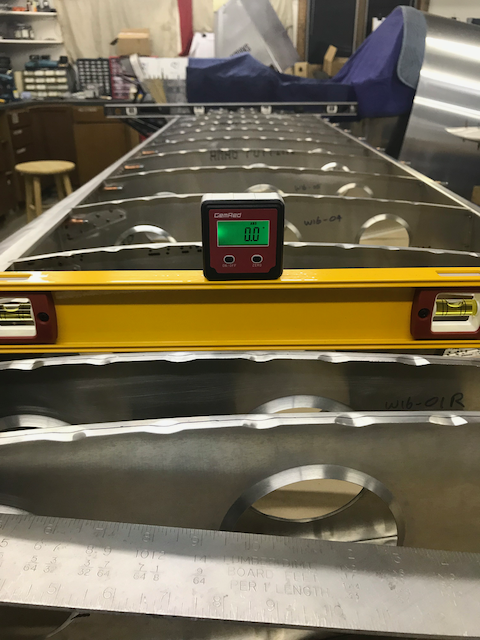
- …level at the root end…
-
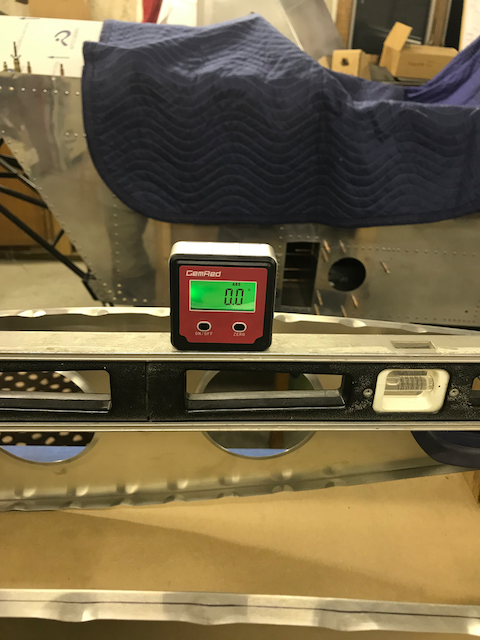
- …level at the tip…
-
- …and dimensionally correct.
I may work on the jig a little more to keep everything solidly locked in place to enable the next step; the first wing skin.

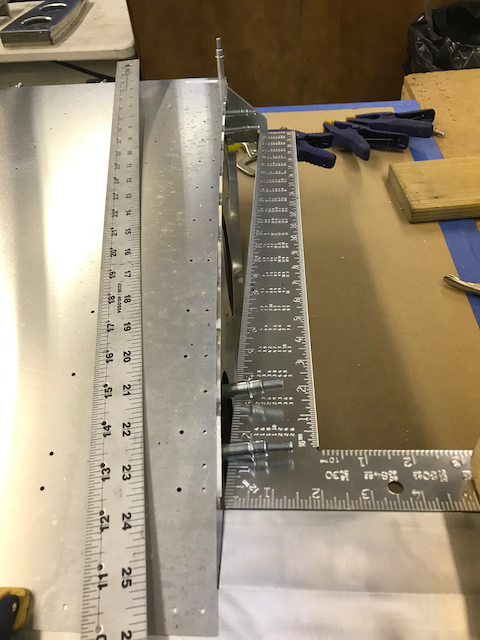
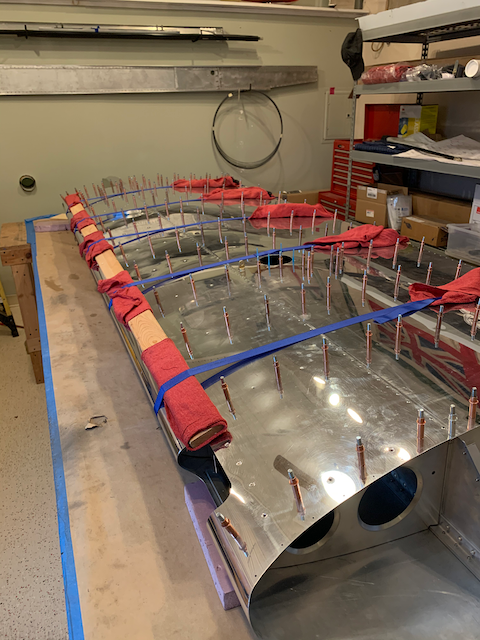
December 31st – Before I started drilling holes, I clamped the squares a little more accurately and then screwed all my blocks down to keep things from moving.
-
- Clamped…
-

- …lined up…
-
- …and secured.
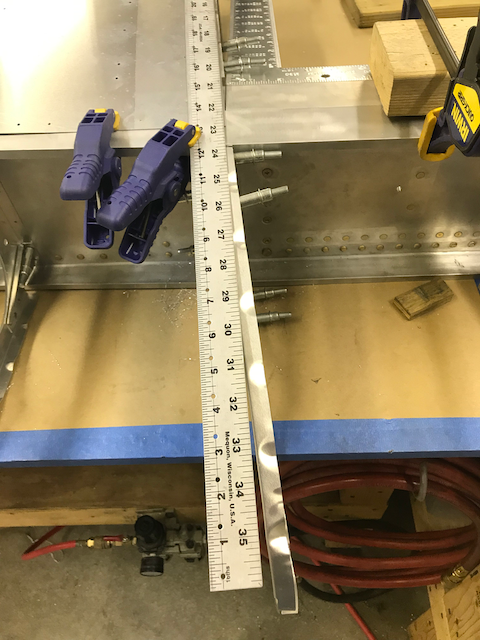
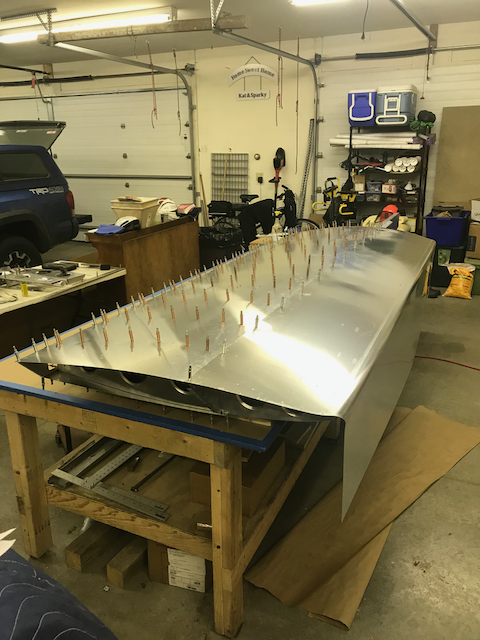
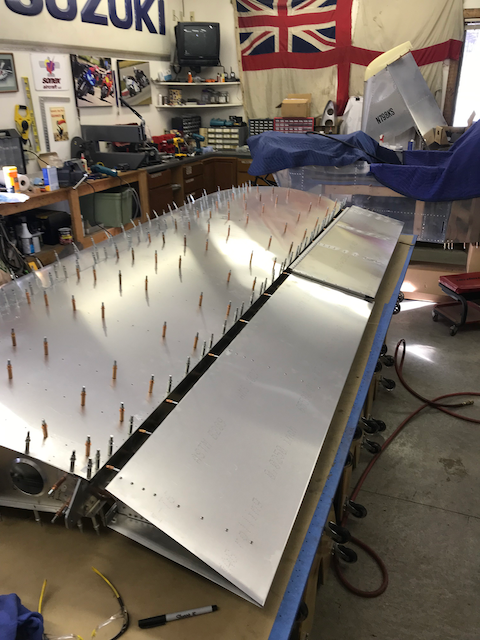
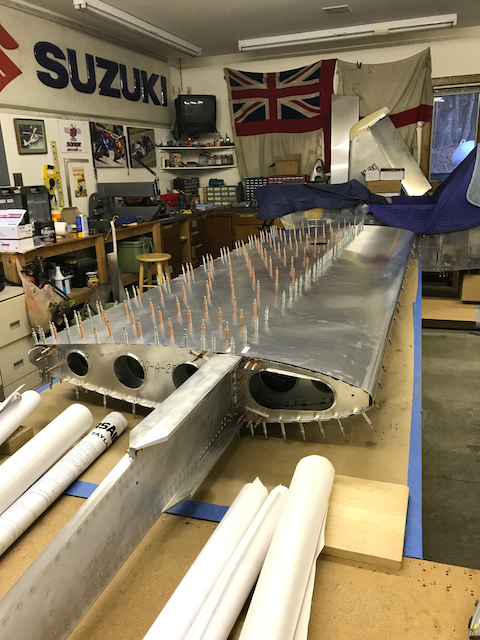
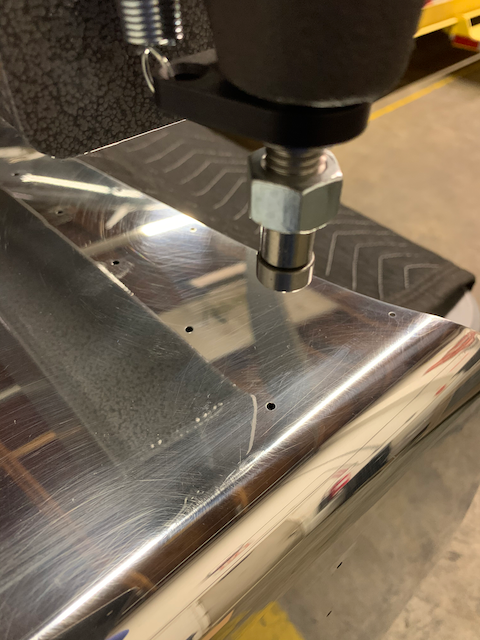
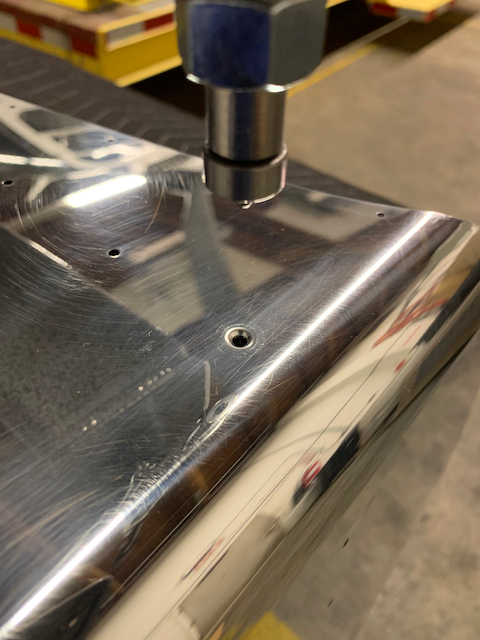
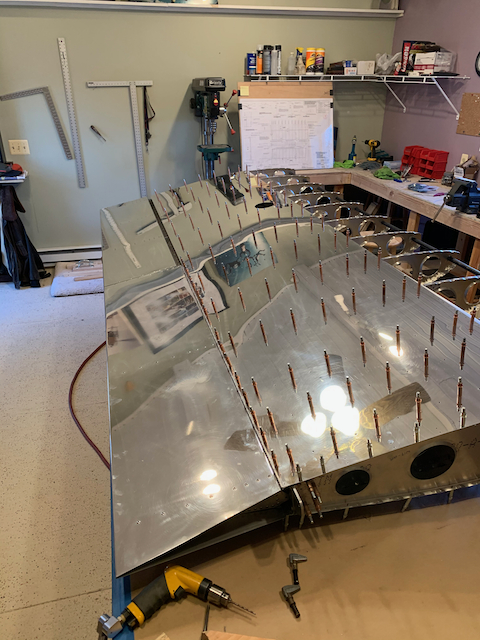
And then, it’s time to start drilling the couple of hundred holes that hold the skin in place.
-
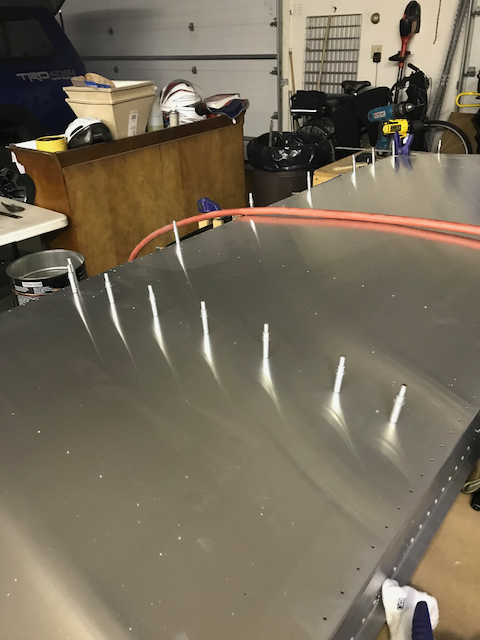
- Started…
-
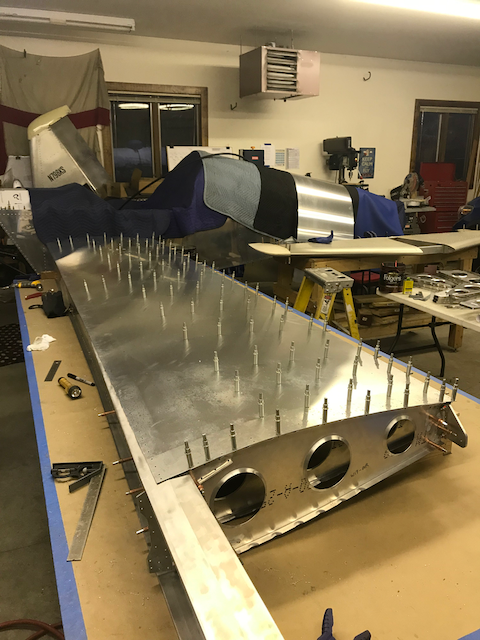
- …progress…
-

- …finished…
-
- …and updrilled.
You may have noticed that the forward ribs are missing. I have decided to skin the wings with the ribs clecoed in place rather than riveted; this way, I will be able to take the entire structure apart to do a better job of deburring everything before final assembly.
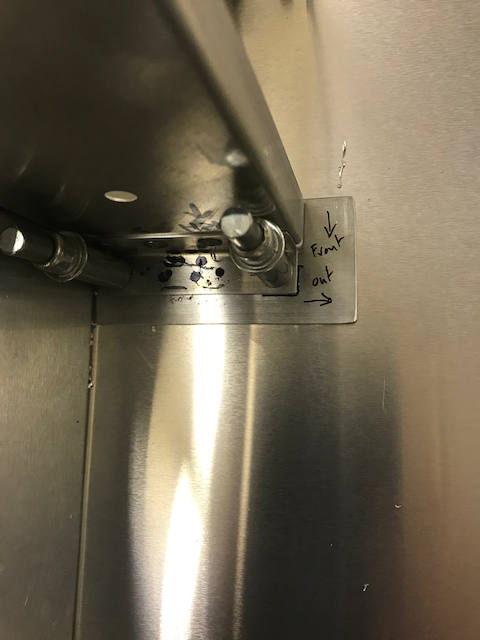
The next step is to flip the wing over and, as it’s still flexible, accurately clamp it again before attaching the bottom skin which will lock everything in place. As this will close off access to the forward ribs, I now clecoed them on. I also drilled the holes to attach the bellcrank mounts, they needed squaring up and shimming to (hopefully) prevent dimpling the skin. Another job I had to do to the forward ribs before attaching them was to drill out the tooling holes to allow a length of PVC tube to be passed through them; this will allow the wires for lighting to be run after the wing is skinned.
-

- Wing flipped…
-
- …square…
-
- …and level.
-
- Ribs drilled.
-
- Bellcrank mount square…
-
- …and shimmed.
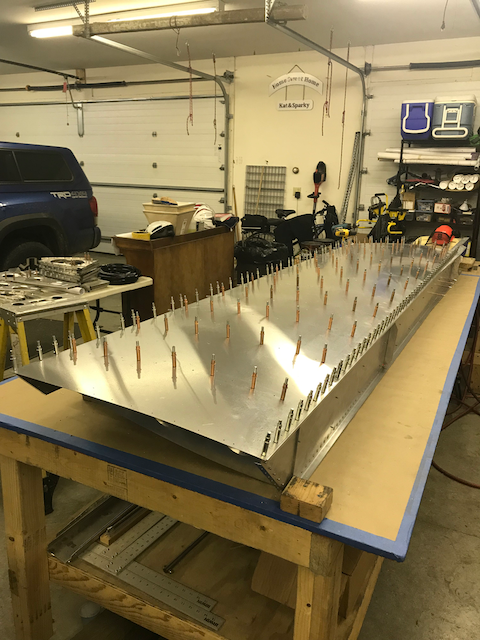
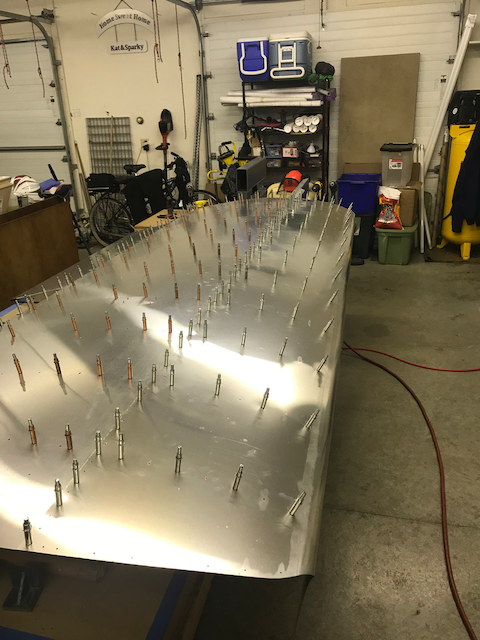
Then it was just drilling more holes and this is where I ran into a snag; there are so many holes that I have run out of clecos!
-
- Ribs attached.
-
- Skin attached…
-
- …no more clecos.
I have ordered more but as it is the holiday season, I’ll be waiting a while for delivery.
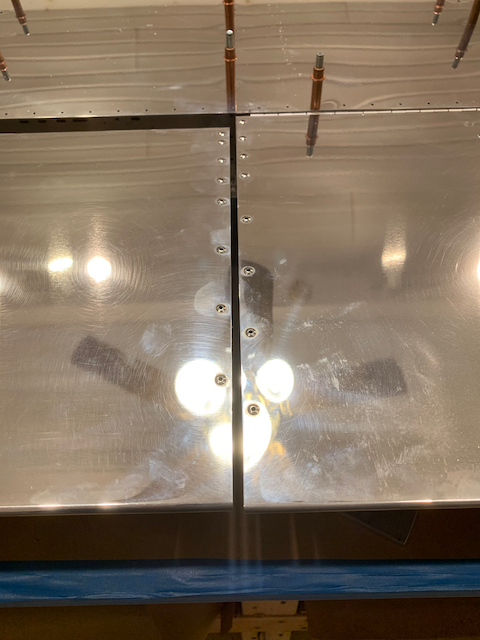
January 27th – The clecos arrived but about a quarter of them were deficient, I called Brown Aviation and Aircraft Tools and they’re sending some replacements. By robbing Peter to pay Paul, I managed to scrape enough together to start attaching the forward skin.
-
- Attached to the spar…
-
- …and the top of the ribs.
While I wait for my delivery, I started on making up the Flap for this wing. The technique is practically identical to the early days of the build making the tail parts; the skin is cut to shape, ribs are put in place and drilled then the whole thing comes apart for deburring, re-assembly and riveting.
-
- Drive plate…
-
- …in place.
-
- Hinge attached…
-
- …protective sheet removed
Another learning point here. I’ve been working on this so long that the glue holding the protective film on has cured to the point that it’s a real pain to get off. If I had known that ahead of time I would have peeled it when I received the kit. I left it on primarily to protect the surface for polishing but now that I’m planning to paint, it’s not so important.
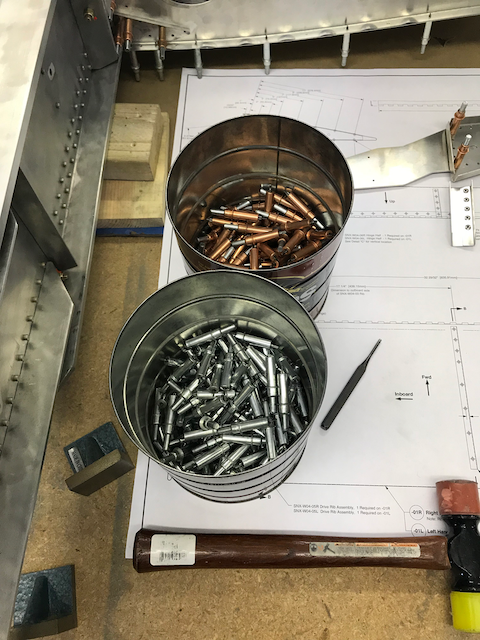
I hit a milestone when I riveted this Flap, I used up the last of the first bag of rivets. 2000 down!
-

- New bag of rivets.
-
- Flap complete.
Still no sign of my replacement clecos, so I started with the aileron for this side. I’m putting the slightly larger, aerobatic ailerons on; they are longer and slightly more complicated but it’s fundamentally the same process. The ailerons have a balance weight incorporated so I had to cut a block of lead to size. A hand saw lubricated with cutting oil worked just fine.
-
- Skin cut.
-
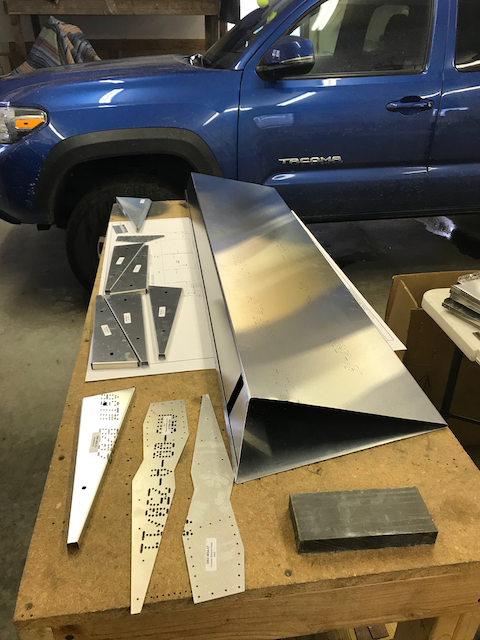
- Components laid out.
-
- Lead marked…
-
- …and cut.
Now to start building components.
March 6th – The counterbalance assembly sandwiches the lead block between a couple of attachment plates and two ribs; I clamped everything in place then drilled the plates and lead blocks.
-
- Cleco delivery.
-
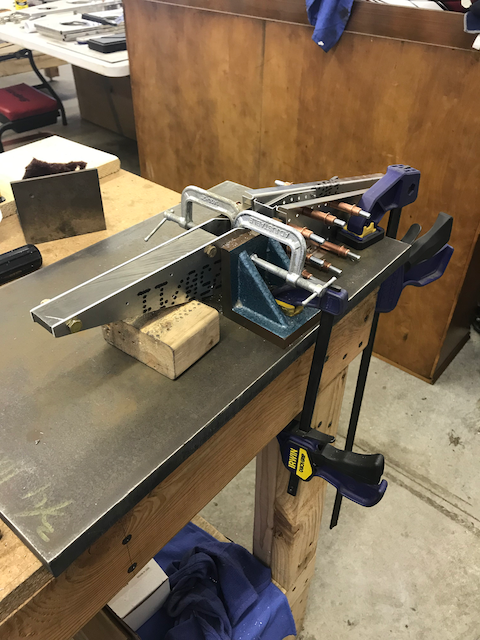
- Counterbalance drilling.
I thought I had everything lined up but the drill bit wandered through the lead and I ended up with some ugly holes. I updrilled to use AN4 hardware but it’s not much better. An email to Kerry followed, his recommendation was to leave it as it is; these are not load bearing and I need to keep as much lead in place as possible to aid balancing the ailerons. I will clamp and drill differently for the other side when the time comes.
-
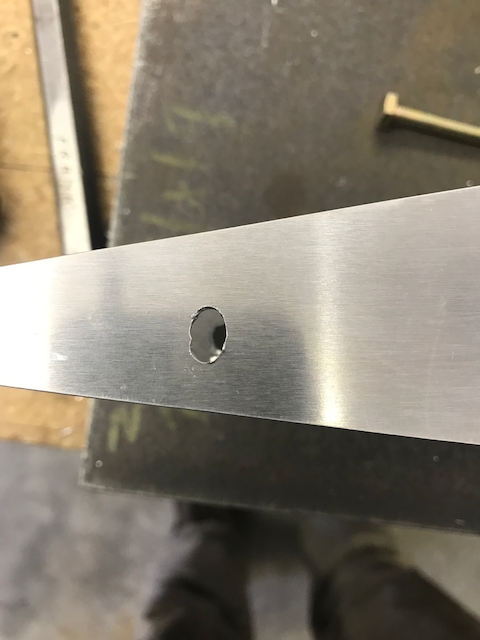
- Ugly…
-
- …marginally better.
With the counterbalance and ribs complete, with the hinge attached, the aileron is coming together.
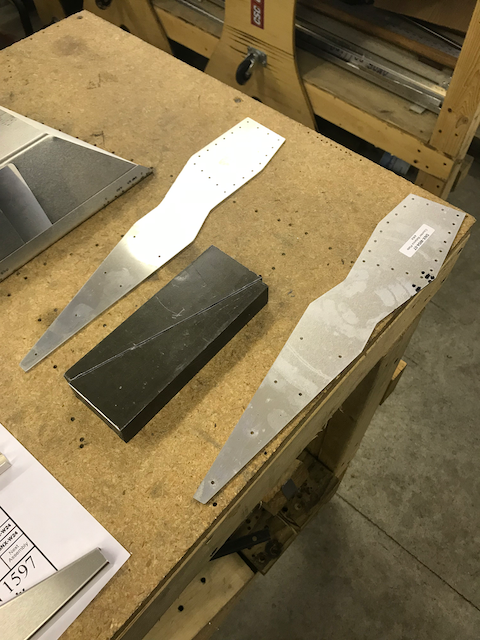
I ran into another oops with the end rib. I got it in position with a nice fit and drilled the pilot holes but when I took it apart to check clearance, it became apparent that I had measured the hole line in the skin incorrectly, I went 1/4″ too far so the holes in the rib are too close to the edge.
-
- Line in wrong place…
-
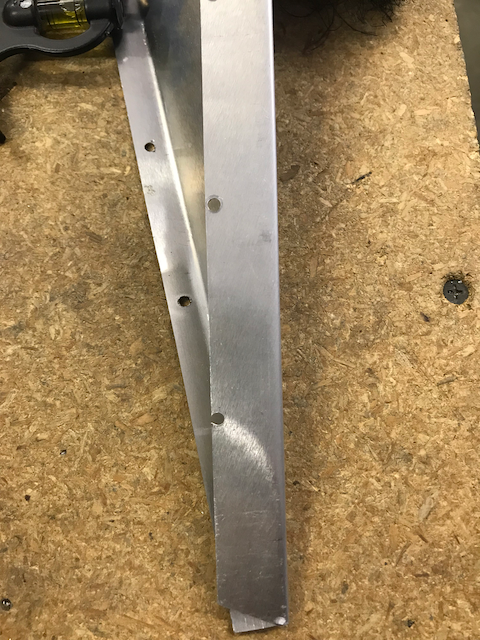
- …equals holes in wrong place.
I made up a new end rib with a wider flange and ended up with a decent fit.

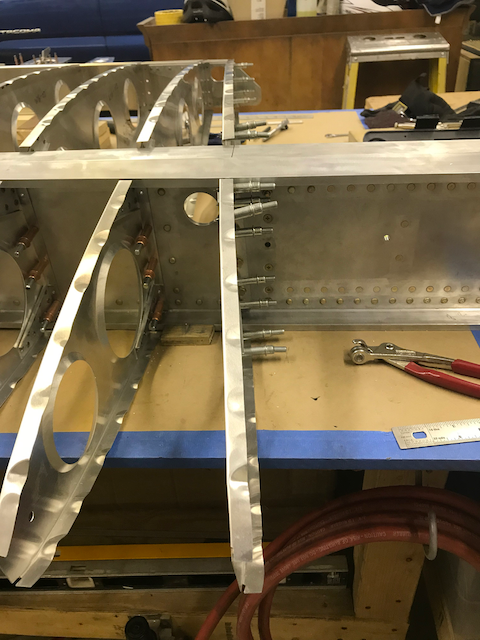
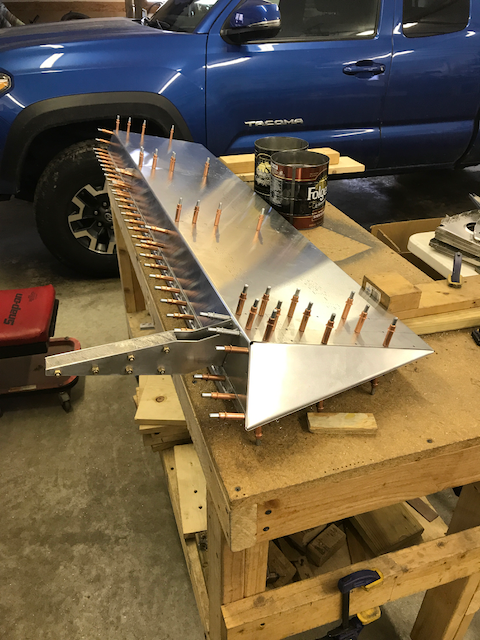
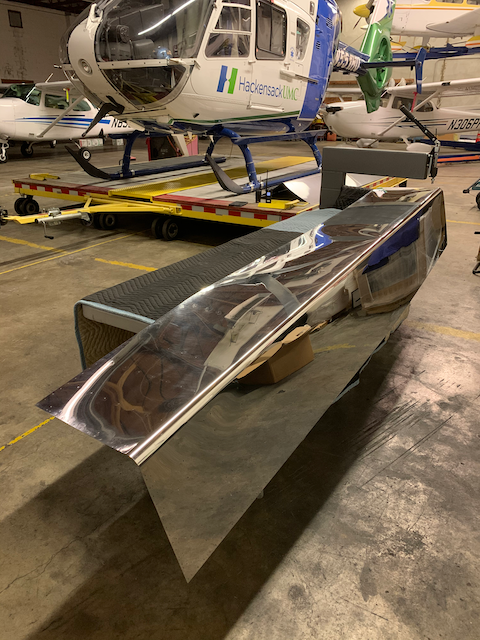
Here’s a gratuitous shot of the wing with the flap and aileron rested in place.
My focus is going to change now for a while.
My time with UW Med Flight is coming to an end; the vendor providing aviation services is changing, I will be staying with the old vendor and, as they don’t have any jobs in the local area, we will be moving again. I have taken a job with the AirMed One Program based at Greenwood Lake Airport (4N1) in West Milford, NJ. Everything is going to have to be moved about 1000 miles East.
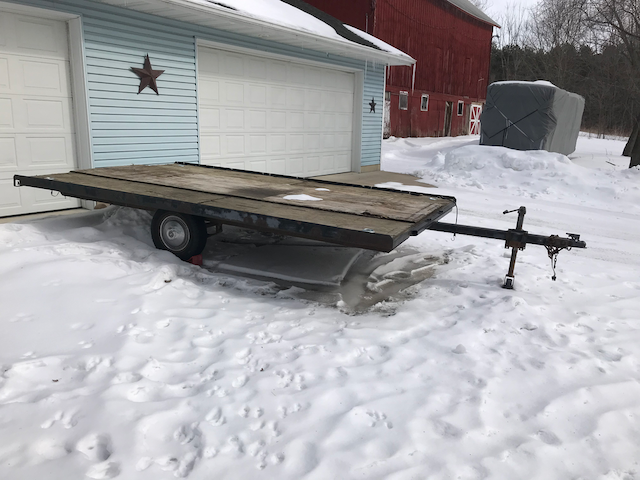
With this in mind, I will attempt to get the wing skin completely attached, disassemble everything for deburring then transport the components separately. I should be able to get most everything in the 12′ covered trailer but the Fuselage and main spars won’t fit. I found a 13′ snowmobile trailer on Craigslist and will figure out a way to get the larger parts secured ready for the road trip.
The next project.
July 21st – Well, best laid plans and all that; I did get the wing skins on but moved everything in a different manner.
First things first. I flipped the wing and set about finishing the front skin, I used a couple of ratchet straps and a 2×4 to pull the skin into place to get the holes lined up on the spar.
-
- 2×4…
-

- …ratchet straps…
-
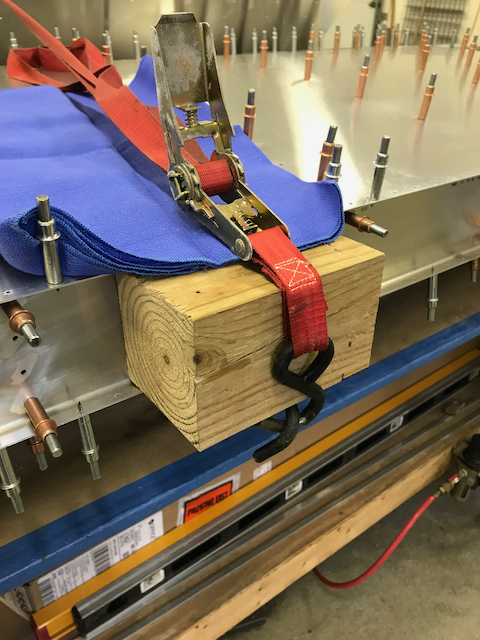
- …blocks to prevent crushing…
-
- …clecoed to the spar
From there, it’s a question of lining the ribs up with the pre-drilled holes, drilling the pilots and getting the clecos in. I got them all done and updrilled but when I was done, in some places there is a gap between the skin and the rib that seems excessive to me.
-

- Forward skin attached…
-

- …but with quite a gap between skin and rib.
As there was a bit of a time element, I decided to let this go and will address the issue when I get settled in the new shop. For now, it will be much easier to transport the wing in component form, so everything came apart.
Now the fun part of packing the entire project up and moving it securely to New York State began. I didn’t like the idea of everything being exposed on the trailer so plan B was to put all of the aircraft parts and a large part of the garage into a 26′ U Haul truck plus 12′ covered trailer and make a seperate trip to the East Coast. I wrapped everything up as well as I could and built a platform to strap the fuselage to.
-
- Truck outline…
-
- …boxes…
-

- …bubble wrap…
-
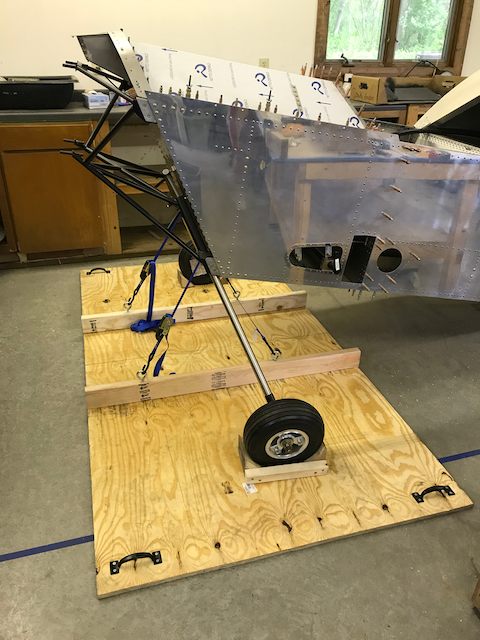
- …and a “dolly” to secure the fuselage.
Everything then went into the truck and we hit the road.
-
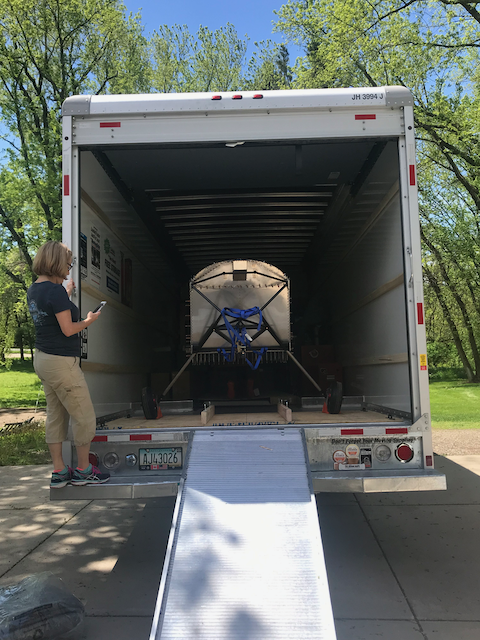
- It fits…
-

- …everything strapped down.
As we hadn’t bought a house at the time, this lot is going into a storage unit until I have a new place to continue construction. As I packed up the last few pieces, the Ensign came down on the Sunset Drive phase of the Sonex journey.
-

- Goodbye Sunset Drive workshop…
-
- …where next?
December 7th – It’s been a busy few months but I finally have something to post. It took longer than I expected to get the workshop to a state that I could start working on the wings again but I’m finally there.
-

- The Ensign is back up…
-

- …pictures up…
-
- …components unpacked…
-

- …and Sadie has a new spot.
I have started the huge job of deburring all of the wing components so that I can start to reassemble the wing.
My new job is based at a small airport where we share hangar space at the local FBO, I have found room to fit a small portable workstation. I have hours of time on my hands but need to be able to drop everything at a moments notice; sounds like a perfect scenario for polishing.

All the reasons that I had for polishing the aircraft still make sense today, so I’m back to planning on having a very shiny Sonex.
I know that I am still a long way from first flight but, as I haven’t flown a piston engine single in 20 years and a tail dragger in 40 years, I have found a place to do some tailwheel training. I haven’t been flying just for the fun of it since forever but the J-3 Cub is a blast to fly. Something else to keep me out of the shop!
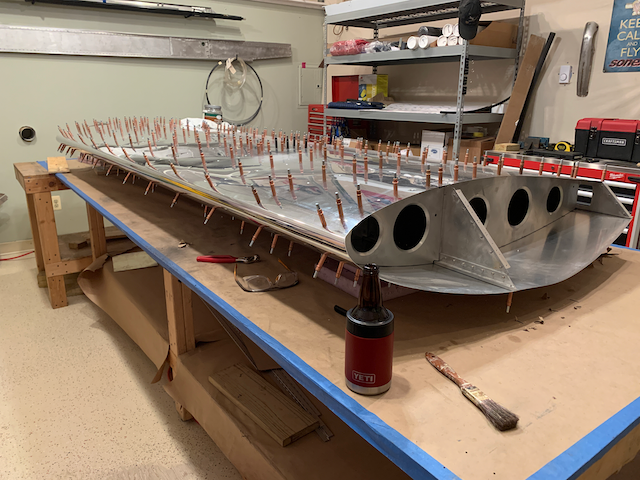
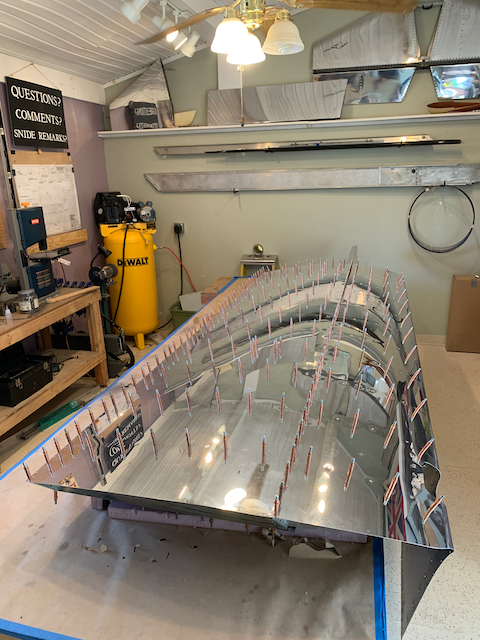
January 6th – I have been plugging away at polishing and now have all the component parts, including the three wing skins, polished and ready to reassemble. I have also finished deburring, so everything can start going back together.
-

- Aft skin…
-

- …pretty shiny…
-
- …leading edge skin.
The leading edge skins are all fastened with flush rivets, the only part of the aircraft exterior that uses them, so the ribs and skins all had to be dimpled. I bought a C Frame tool for this job back before we left Wisconsin and finally had a chance to use it. The main reason for this tool was to be able to do the skins but I was hoping to use it on the ribs too. Unfortunately, the flange on the ribs is too narrow to allow for good dimpling so it was back to the ground down simple dimple die for that job.
-

- C – Frame Dimpling tool.
-
- Ribs won’t fit…
-

- …Sonex’ simple dimple tool, suitably customized…
-
- …does the trick.
The C Frame worked well on the wing skins though.
-
- Before…
-
- …after…
-
- …in progress…
-
- …complete.
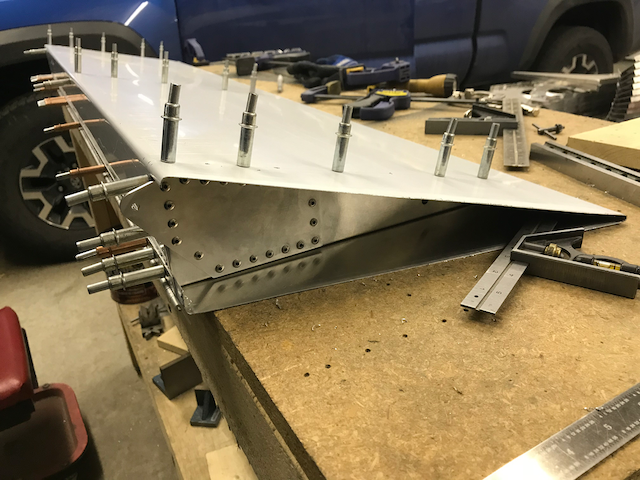
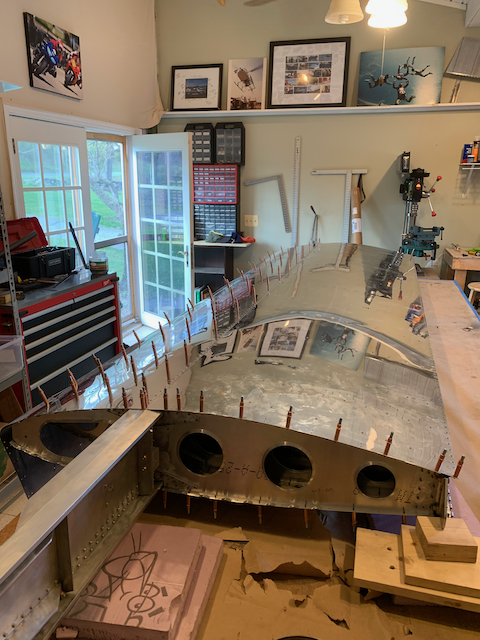
With all the components now ready, wing building can start.
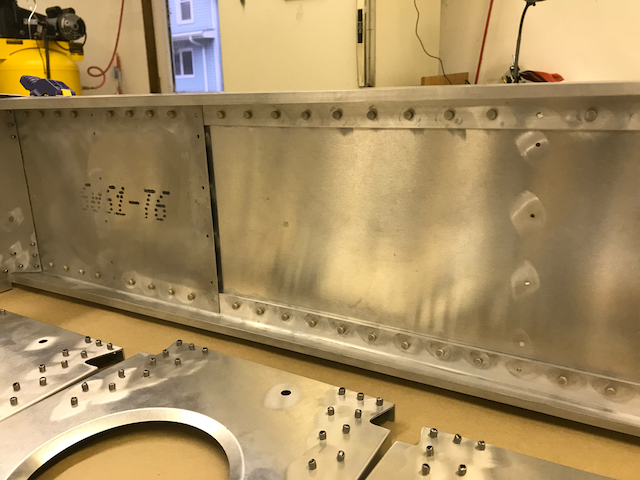
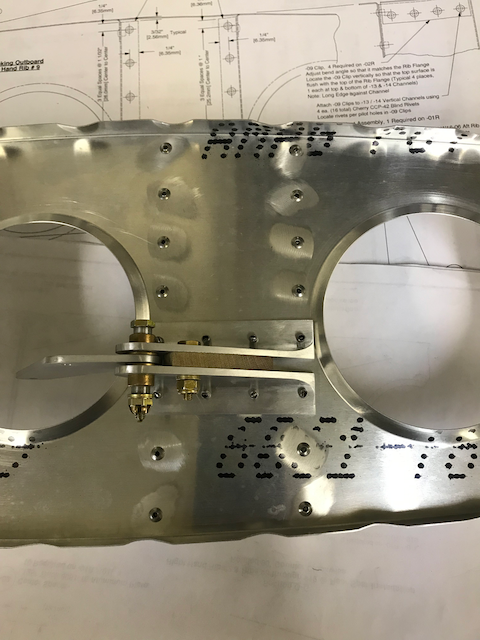
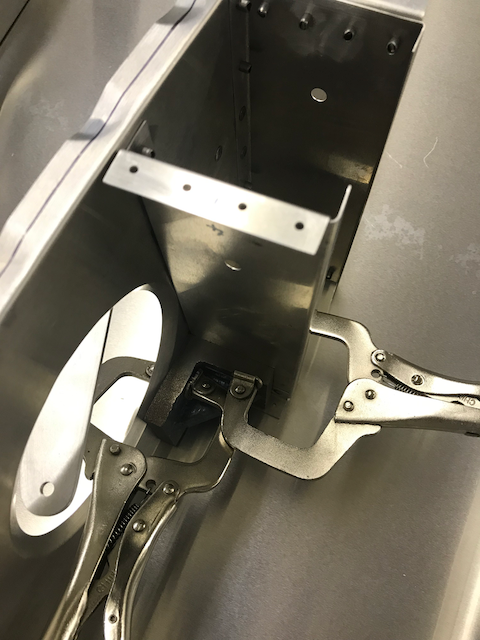
There are several stages to arrive at the complete wing panel and I don’t want to paint myself into a corner by riveting things that will either prevent access to other tasks or make them more complex than necessary. The skeleton of the whole thing is the ribs fastened to the spars so I started riveting them on.
First rivet pulled in New York State!
The area around the root ribs is pretty tight quarters and I still have to mount the wing doubler in place for drilling, updrilling and deburring so I have left this area held together with clecos for now but I do have a structure that looks like a wing.
-
- Tight quarters.

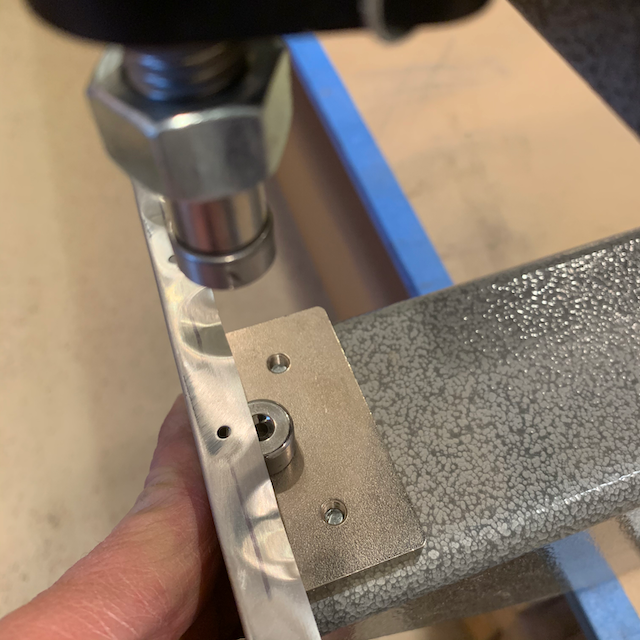
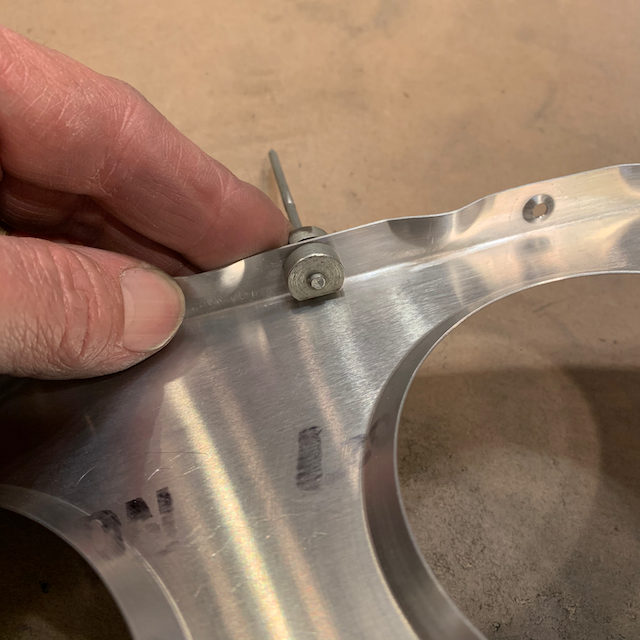
When I was mounting the rib with the aileron bellcrank on it, I noticed that the bushing has more slop in it than I would like so I drilled it out of the rib to have a better look.
-
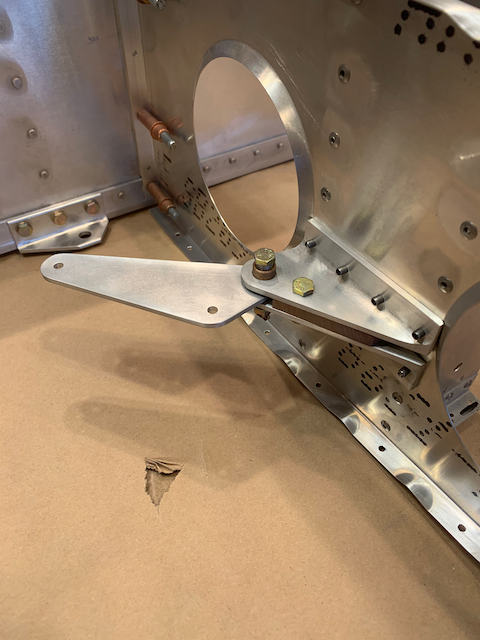
- Bellcrank…
-
- …drilled out…
-
- …sloppy bushings.
The bushings are loose in the bracket; I have ordered some oversize bushing and will ream the hole to get a better fit.
January 27th – The replacement bushings arrived and I am happy with how they ended up but I forgot to take photos.
I have also moved on with the wing, I took down the Flap and Aileron from storage and mounted the piano hinges. I had a minor oops, I measured twice before drilling once, I should have measured three times. When I mounted everything up, the gap between the two control surfaces was a little wide. It is just about within tolerance but it would have bugged me forever if I left it so I ordered up some replacement piano hinge and tried again.
-
- Control surfaces mounted…
-

- …large gap…
-
- …better.
With the aileron in place, I have found an issue that other builders have come up against; clearance between the counterweight and the rib.
-
- Counterweight…
-

- …lack of clearance.
I filed down the head of the two offending bolts and will try to dimple the rib when it is finally riveted in place.
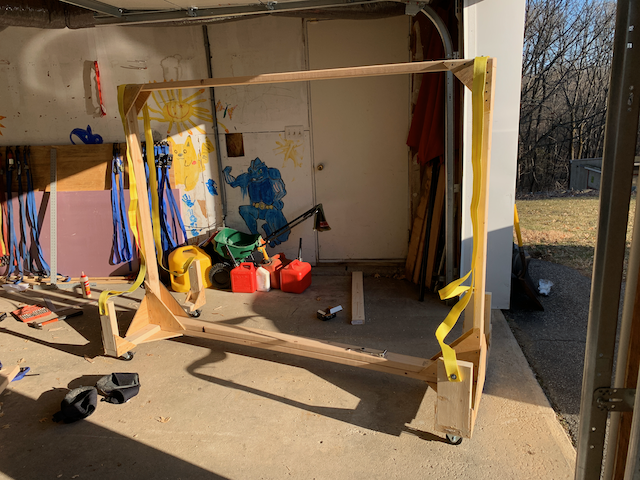
There is a fair amount of moving the wing around required, it is fairly unwieldy and heavy with all the clecos in place. I don’t always have my trusty assistant available so I came up with an arrangement to help. Not pretty maybe, but it does the job.
Wing spinning jig thing.
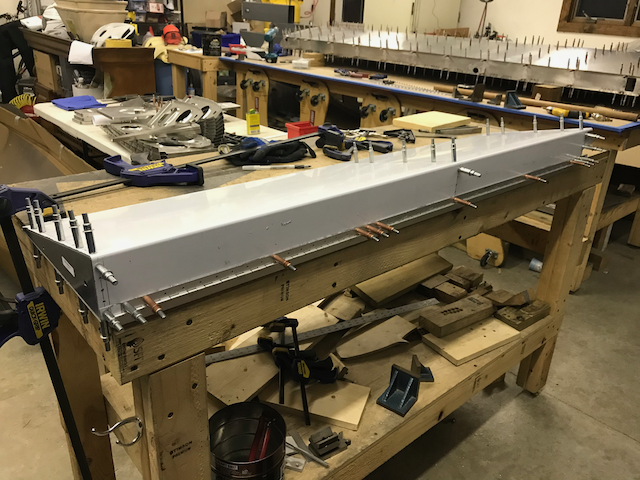
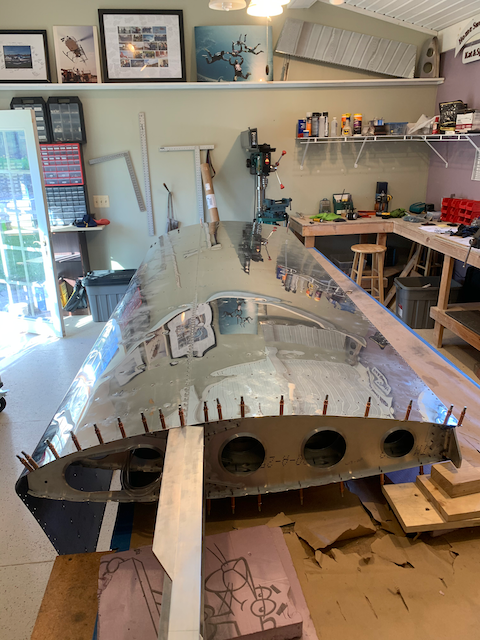
With the assistance of this device, I got the top of the now dimpled forward skin on and flipped the structure over. I used two ratchet straps to pull everything together the first time I did this and I have so many straps left over from the move that I used five this time which worked really nicely and in a much more controllable fashion.

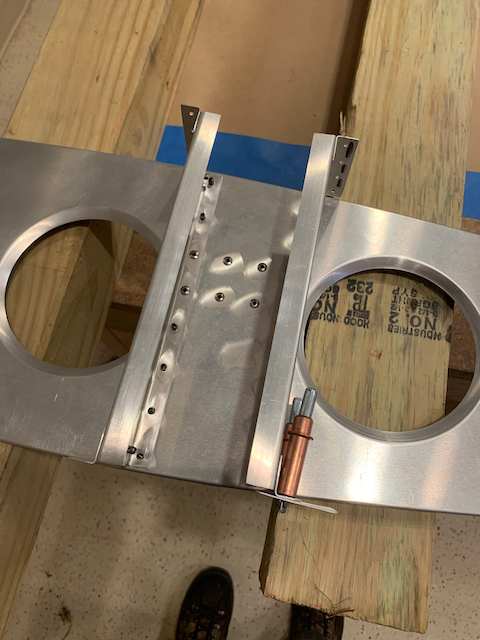
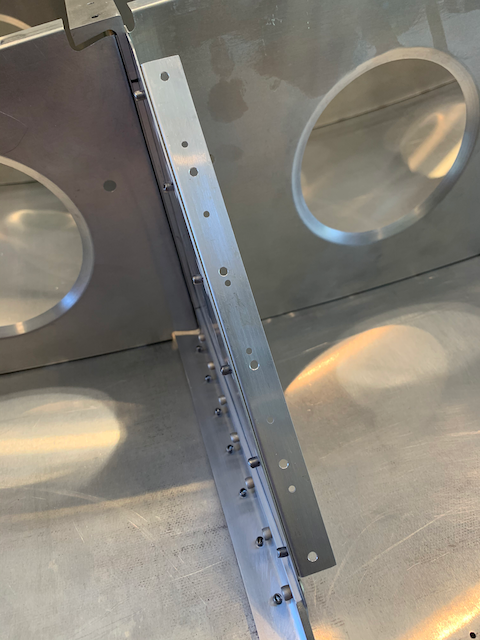
With all the wing skins now in their final locations, I could attach the root doubler. This won’t get riveted until the wings are rigged to allow for final trimming.
This was another part supplied pre-drilled by Sonex and the accuracy of the holes is amazing, the fit around the leading edge couldn’t be much better.

Nice fit.
At the other end of the wing, the next job is to fit the tip rib; more fiberglass work.
And with that done, it’s time to take it all apart again for final deburring.

One last deburring session, then it’s rivet time!
April 11th – After the mega deburring session, there are a few small jobs to do as I put the wing back together. The first of these was to transfer the location of rivets in the end of the fiberglass ribs and here I made another oops, well, two actually. One was in locating the holes and one in execution of drilling them. I thought I was being clever by transferring the hole location before fitting the front skin but I lined up on the wrong set of rivets and ended up with them all in the wrong place.
-

- End rib in place…
-

- …hole location transferred…
-

- …but in the wrong place.
It will be a simple matter to replace the angle and I think the six rivets will hold the rib securely enough. Unfortunately, my drilling technique ended up with some chipping in the gelcoat, I will have to touch that up at a later date.
Ugly holes, touch up will be required.
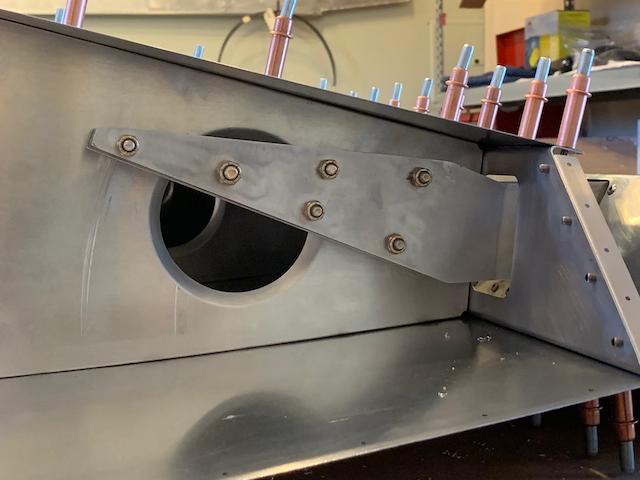
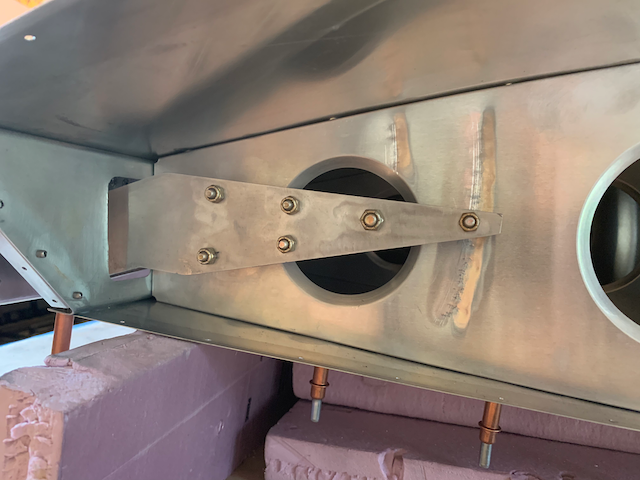
With the forward skin reinstalled, there are a couple of other little fittings to take care of; the tie down bolt hole, an inspection hatch and the pitot tube.
-

- Hole cut for tie down…
-
- …pitot mount…
-
- …in place.
I took a bit of a break here as a new wrinkle inserted itself. We decided that we were going to downscale and looked at moving to a smaller house in an area with cheaper property taxes. This would require packing up and moving the workshop again. As the move would be local in nature and could be done over time, I decided to leave the wing in it’s assembled but not riveted state, and built a rack to hold the completed wings. I got the plans from another Sonex builder’s website and spent a little time wood working.

We found a house and were all set to close when the Covid-19 hoopla started. Fortunately, we were able to get out of the transaction at the last minute before we ended up paying for two mortgages in these crazy uncertain times. So, I have wing storage, and now I can finish off this wing and get started on the other side. I am still working though and the yard work is getting started up again so I’m not sure how much time I’ll have for the Sonex.
Stay tuned…
May 5th – I found some time in between mowing the grass so continued with the items I want completed before closing up the wings.
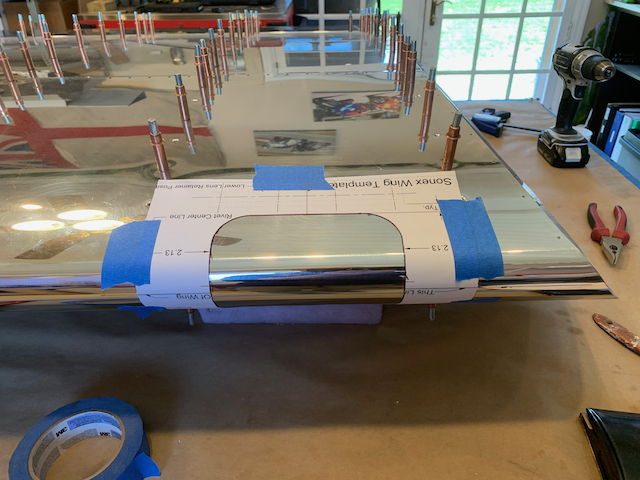
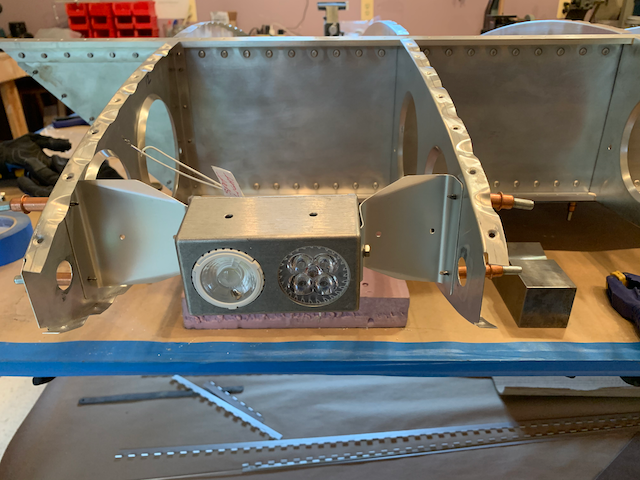
I may have mentioned this before but I am planning on certifying the plane for day/night VFR so it will need some lights. I’m still not 100% certain as to whether the navigation lights need to be certified or not, there seems to be some difference as to how various inspectors across the country interpret the FAR’s in this matter. The certified version of the lights are about three times the cost of the non-certified units; whichever ones I finally go with will be mounted on the glass fiber tip ribs and so can be dealt with later in the build. There is, however, no need for the landing/taxi lights to be certified so I ordered up two units from Fresh Aero Aviation; they are compact, lightweight LED’s and are available with a Sonex specific mounting unit.
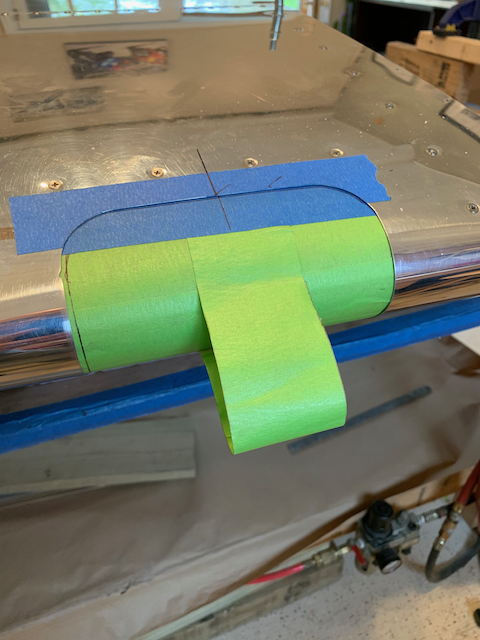
Now I have to cut a hole in my nice, shiny wing!
-
- Leading edge line marked…
-
- …template in place…
-

- …cutout made…
-
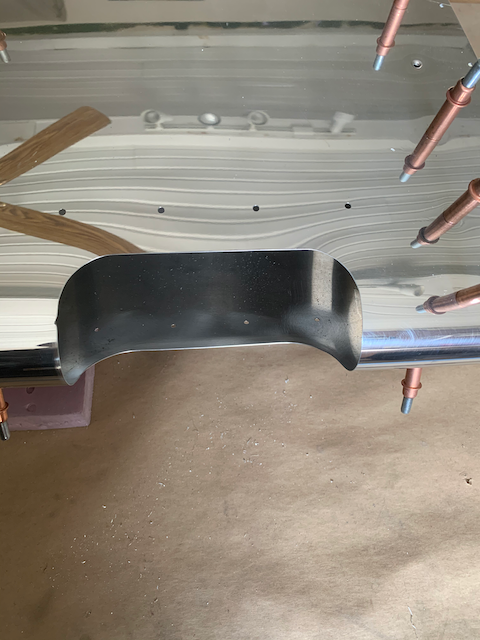
- …and finished.
If you look closely at the last image you may notice another ‘oops’, there is a notch in the otherwise smooth hole. I used a cutting wheel to make the initial opening with my attention focussed on the front part of the wheel, neglecting to notice the back part had crossed the template line. I dressed out the notch and, as it is actually on the underside, decided to leave it in place; another reminder of the little mistakes I have made throughout the build that won’t detract from the functionality.
With the light cutout done, I removed the leading edge and upper skins again.This gave me access to do an initial tryout of the aileron and flap control runs. I’m not going to fit them permanently yet but I did want to get the fittings assembled with the easier access to the fiddly parts. When the time comes to mount them permanently, I will be able to get to them through the inspection hatch in the lower wing skin.
-

- Flap drive.
-
- Aileron bellcrank and pushrods.
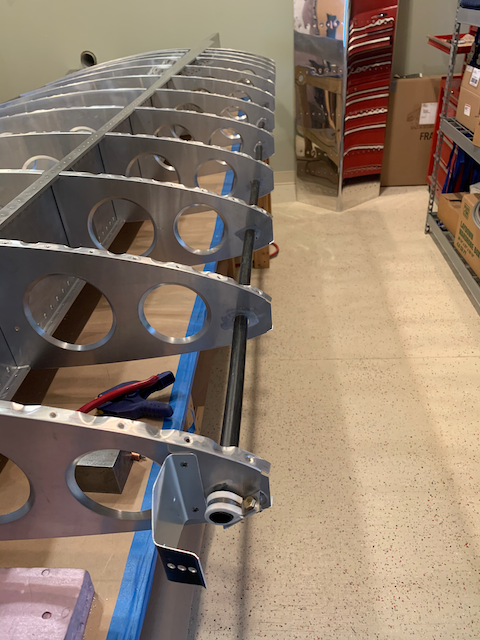
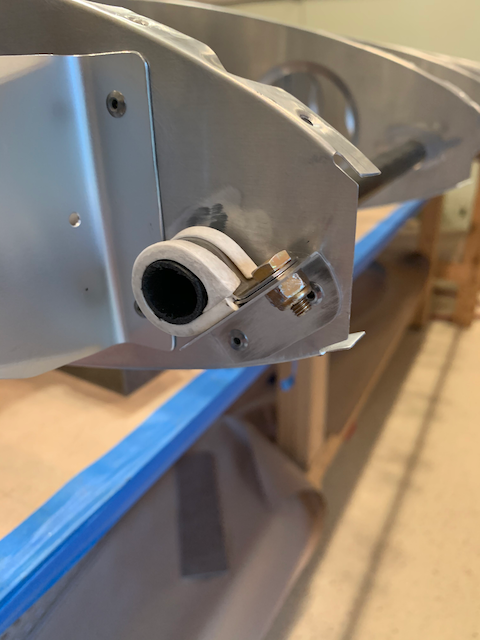
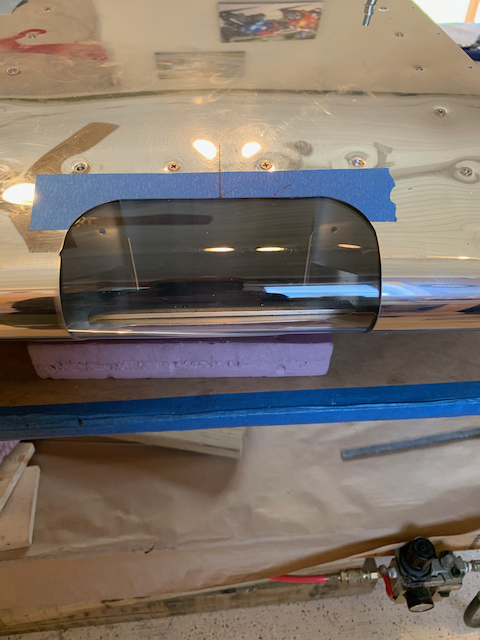
Next up was to mount the landing/taxi light module. Another template positioned a couple of brackets and the light bolts on to them.
I want to be able to easily run wires out to the wing tip after everything is closed up so the pvc tube goes in next. I riveted a couple of fittings to the adjacent ribs to allow an adel clamp to prevent the tube from moving.
With the upper skin off, I could hold a bucking bar up against the outside rib where the aileron counterbalance weight’s were rubbing and used a ball peen hammer to provide some clearance. With the upper skin back in place, I remounted the aileron to check for clearance; all good now.
With that done, all the little jobs were taken care of and riveting could commence.

First wing rivet!
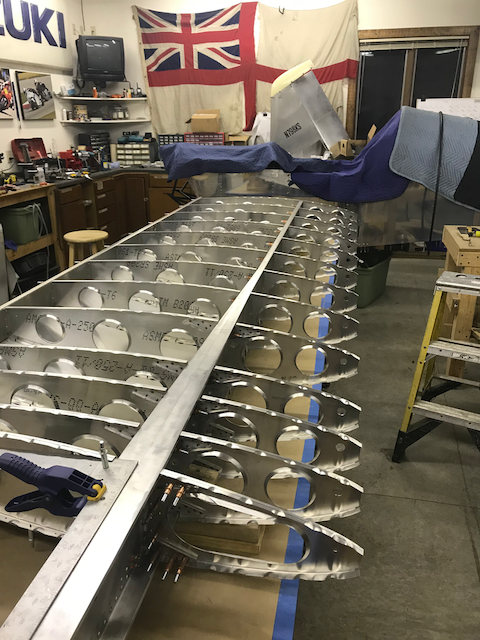
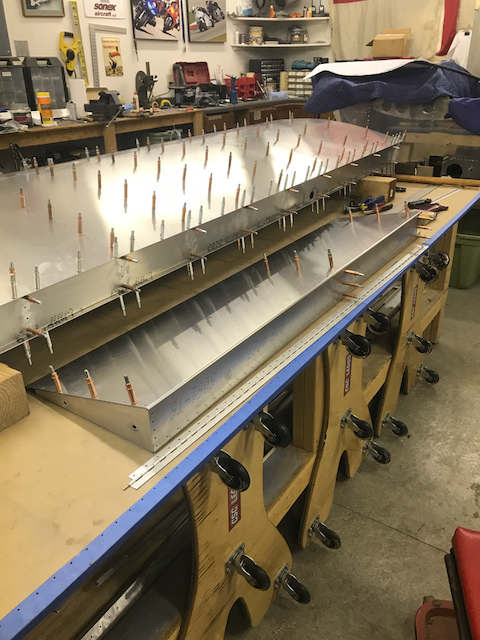
And so the process of making this thing look less like a demented Hedgehog and more like a wing begins…
-
- Hedgehog…
-
- …rear skin…
-
- …forward skin…
-
- …wing flipped.
There’s about 300 rivets per side, I ran out of time and will come back to this on my next week off.
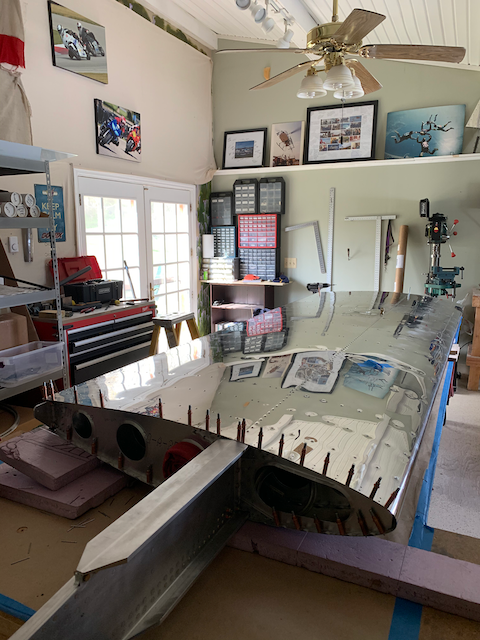
May 18th – My week off was pretty productive, the right wing is essentially finished, here’s how I got there.
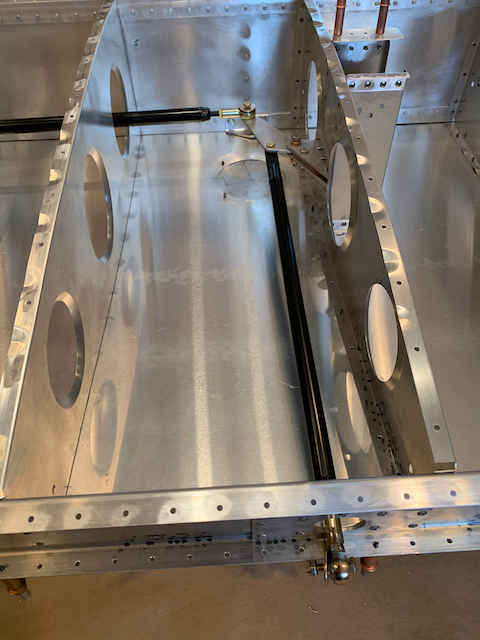
With the wing flipped there were a couple of other jobs to do but it meant removing the lower aft skin again. With access open, I went ahead and attached the control rods; I figured it would be easier to torque the nuts with the skin off and with the rods in place, they will be safely stored with the rest of the wing.
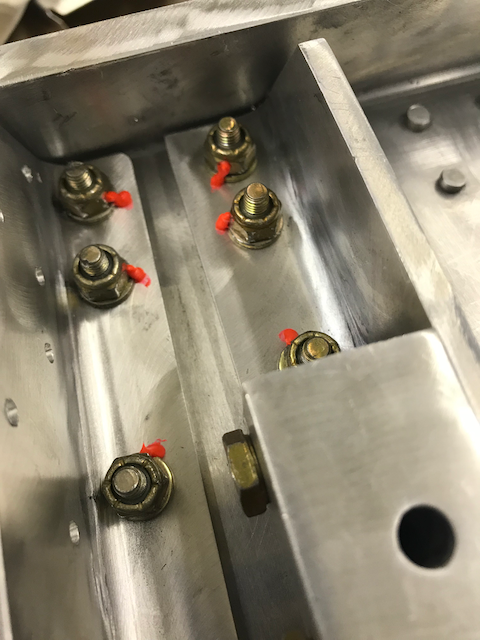
Torqued, pinned and striped.
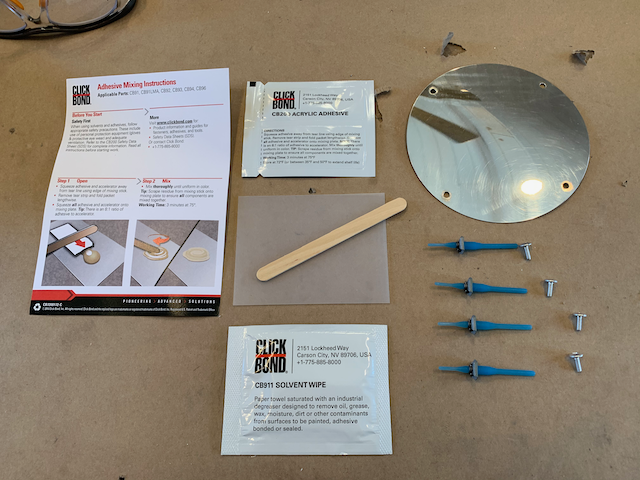
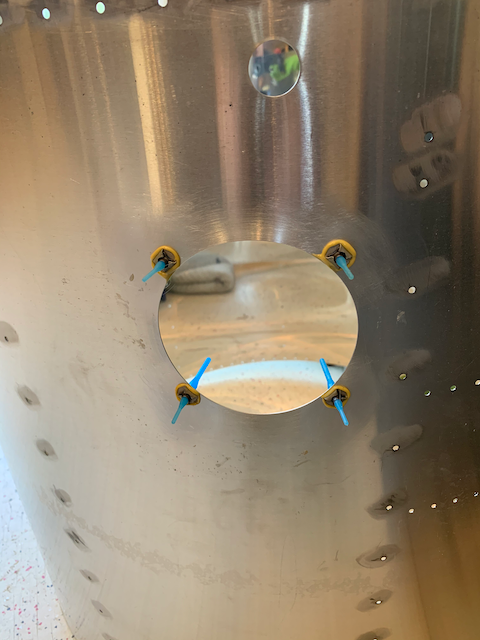
With the skin off, I started another side project. There is an inspection hatch in the lower skin to access the bellcrank which is held in place by sheet metal screws going into the wing skin. I feel that arrangement is liable to the thread being stripped in the thin material but realize that it doesn’t really warrant the complexity and weight of riveting in some nut plates. However, when reading through an issue of Kitplanes magazine, I came across a reference to a Company called Click Bond who make some lightweight fasteners that are glued in place. I gave them a call and even though they are not particularly cheap, I ordered some up and have installed them. They come with small packets of suitable adhesive and are held in place by silicon “pull tabs” while the glue cures. It took a while to go off in the workshop during a couple of cool nights but I ended up with a more secure way of holding the inspection plate in place at virtually no weight penalty. A pretty elegant solution, I will be using them in other places on the build.


I also took time to replace the mis-drilled tip rib attachment and with that complete, moved on to re-skinning the wing and finishing off the riveting.
-
- Bad holes…
-

- …new fitting.
-
- Skins reattached…
-
- …riveting completed!
With the forward skin in place I could finish off the instal of the landing/taxi light by fitting the lens. This required marking up and trimming the acrylic cover.
-
- Fitted…
-
- …in place…
-
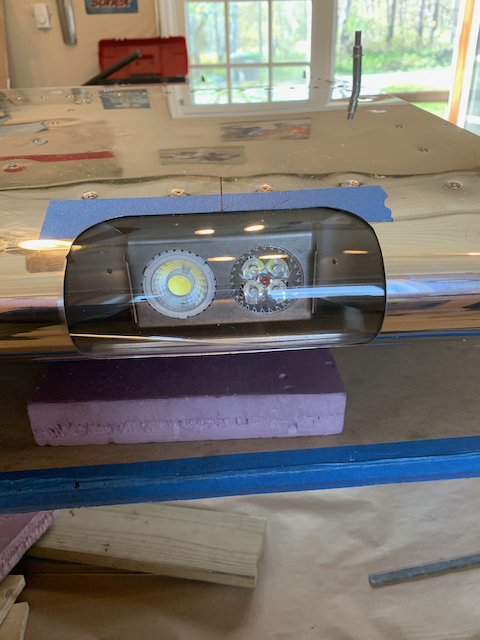
- …with light unit.
The eagle eyed amongst you may have noticed another oops. The Acrylic is pretty brittle and I managed to crack a lens with my initial hamfisted efforts. I do have a set for the other wing though so I used my experience with the cracked one to get a decent fit with the second and have ordered a replacement which will arrive in plenty of time to instal in the left wing.
With that done, I attached the root doubler with clecos, it doesn’t get permanently attached until after the wings are rigged, and then attached the flap and aileron so I can get it stored out of the way to start work on the next one.
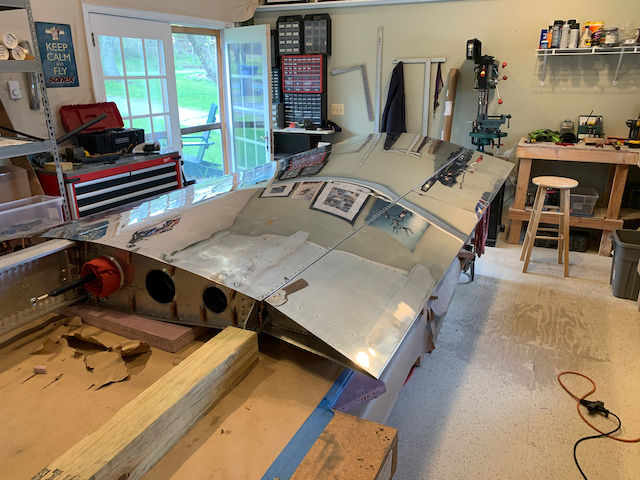
I’m hoping that with the knowledge and experience gained on this side, plus the lack of a multi state move, the next one should go a bit faster. For now, it’s time to store this one and I will start a new page.
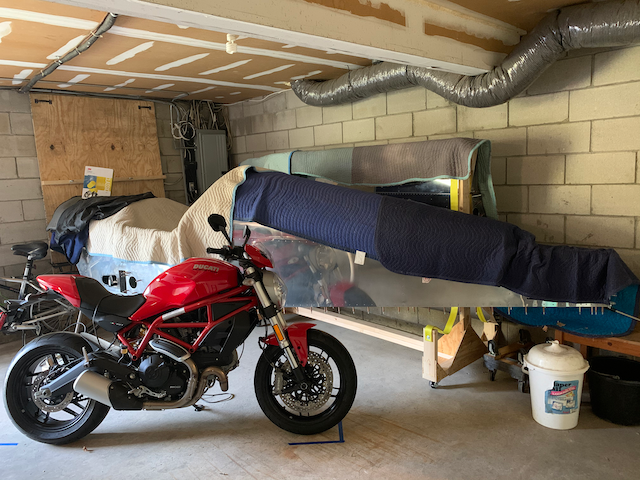
Safely tucked away on the Wing Rack.